


80
To copy data, use any of three methods as follows.
One-touch copy
The still image being displayed is copied. In addition, you
can copy moving images recorded in the designated period
of time starting from the still image being displayed.
Copying data by specifying the copy range
You can copy data based on the specifi ed copy conditions
such as start and end times and data size.
There are 3 methods for specifying the copy conditions as
follows:
•
Specifying the start time and data size
•
Specifying the end time and data size
•
Specifying the start and end times
Archive
You can make backup of data.
Notice
• Before copying/archiving data, check that the devices
are correctly connected (
page 24) and are
correctly registered (
pages 36 to 39).
One-touch copy
You can copy the displayed still images to a USB memory
device or DVD/CD disc as still or moving images. This
function is convenient when you want to copy small
sections of data.
Step
1 Set a USB memory device or a DVD/CD disc in
the recorder.
•
The recorder automatically detects the copy
destination device. When both a USB memory
device and DVD/CD disc are detected, the DVD/CD
disc is used as the copy destination device.
Step
2 Display the image you want to copy in the single-
screen still image playback mode, and then
press the COPY button on the front panel of the
recorder.
•
<Copy menu> is displayed.
•
You can display this menu also from the mouse
operation menu. (
Pages 32 and 33)
Step
3 Select the image you want to copy.
[Moving image]: The recorder copies data recorded
in the designated period of time starting from the
image being displayed.
[Still image]: The recorder copies 1 GOP including
the still image being displayed.
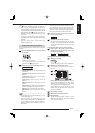
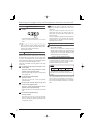
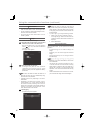
Step
4 When you select [Moving image] in step 3,
designate the period of time of data to be copied.
5Min
Step
5 Select [Execute copy] or press the COPY button
on the front panel of the recorder.
•
The recorder starts copying.
•
When the copy destination DVD/CD disc or USB
memory device becomes full during copying, the
recorder stops copying.
Notice
• You cannot use one-touch copy during copying.
Copying data by specifying the copy range
Setting the copy conditions
Step
1 Press the COPY button on the front panel of the
recorder.
•
<Copy menu> is displayed.
•
You can display this menu also from the mouse
operation menu. (
Pages 32 and 33)
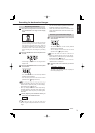
Step
2 Select [Setting] next to [Other copy].
Setting
•
The screen for selecting the copy range is displayed.
Step
3 Select [Setting] next to the desired copy range
selection method.
Setting
•
The screen for setting the conditions is displayed.
Step
4 Set the copy conditions.
[Copy from]: Select the copy source device that
contains the data you want to copy, from among [HDD
(Normal)], [HDD (Alarm)], [HDD (Emergency)], and
[HDD (Archive)].
[Copy to]: Select the copy destination device to
which data are copied, from among [DVD/CD], [USB
memory], and [HDD (Copy)].
Copying recorded data