


75
Search
ENGLISH
•
The data retrieved by the alarm list search are
played repeatedly in both forward and reverse
directions. In this repeat playback, a wider range of
data than those designated by the Pre-alarm time
and Post-alarm time is played.
•
When the recording rate is low, the range of data
played repeatedly may be extended considerably.
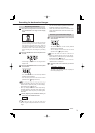
Copying images registered in the alarm list
Step
1 Select the alarm event you want to copy on the
Alarm list search screen in step 3 of "Searching
from the alarm list" on the previous page.
Step
2 Select [Add] next to [Copy list].
•
The <Copy list> screen is displayed.
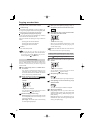
•
You can copy up to 8 images registered in the alarm
list to the copy device. Upon completion of copying,
the alarm events are automatically deleted from the
list.
[Delete]: The selected alarm event is deleted.
[Delete all]: All the alarm events in the copy list are
deleted.
•
By selecting [Confirm] next to [Copy list], you can
check the registered alarm events.
Step
3 Select [Next].
•
The <Copy conditions> screen is displayed.
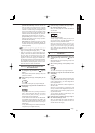
Step
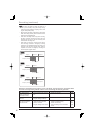
4 Select the copy destination device in [Copy to].
[DVD/CD]: Data are copied to a DVD/CD disc. If the
available space runs out during copying, you can
continue copying by replacing discs.
[USB memory]: Data are copied to a USB memory
device. When the available space runs out during
copying, the recorder stops copying.
[HDD (Copy)]: Data are copied to HDD registered
as the copy device. When the available space runs
out during copying, the recorder stops copying.
Step
5 Set the copy conditions.
[Auto eject]: Upon completion of copying to a DVD/
CD disc, the disc tray is automatically opened. You
can select this option only when the copy destination
device is [DVD/CD].
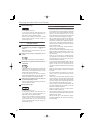
Step
6 Select [Test] to calculate the size of the data to
be copied.
•
The recorder may take time to complete the
calculation depending on the data size.
Step
7 Select [Execute copy].
•
The recorder starts copying.
•
To stop copying manually, select [Cancel] on the
copy process screen. The data copied before you
stop remain in the copy destination device.
Notice
• When repeat recording to the normal recording area
or alarm recording area (
page 40) is disabled and
alarm recording (or emergency recording) is started
at the end of the HDD, that recording may not be
registered in the alarm list.
• When you copy an image from a camera that is not
corresponding to the alarm sensor number to external
media, the alarm list same as that of the recorder
cannot be made.
Tips
• When the alarm list contains only the small number of
alarm events, the recorder may take time to display
the alarm list.
• The alarm list shows alarm recording events (or
emergency recording events) that occurred on or
before the designated date and time, from the one
having the recording date and time closest to the
designated date and time.
• When multiple alarm events such as motion detection
and grounding of the ALARM IN terminal on the rear
panel occur at the same time, the recorder may not be
able to register all of their start time in the alarm list.
In this case, the alarm event of the sensor having the
smallest sensor number is registered in the alarm list.
• When you delete data from the HDD, the
corresponding alarm event is also deleted from the
alarm list.
• To display alarm recording events (or emergency
recording events) that started while the alarm list is
being displayed, carry out the search again. In this
case, it may be required to designate the date and
time to search again.
The list may not be displayed until the recorded data
are stored in the HDD. When preliminary recording is
enabled, the data are transferred with a delay of the
designated time and therefore, the list takes some
more time to be displayed.