


118
Restricting the operations of the recorder (continued)
Registering a password
Use a 4-digit number as a password (consisting of numbers
0 to 9).
Step
1 Press the SET UP button on the front panel of
the recorder or left-click the mouse.
or
•
<Main menu> is displayed.
Step
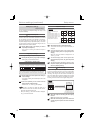
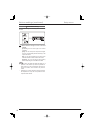
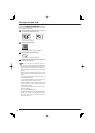
2 Select [Password].
Password
•
The <Password setting> screen is displayed.
Step
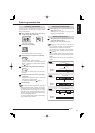
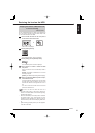
3 Select [Setting] of the level you want to set.
Setting
•
The screen for setting a password for the selected
level is displayed.
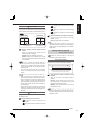
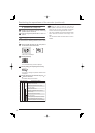
Step
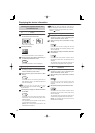
4 Enter a 4-digit password using the number
buttons displayed on the screen.
Tips
• You can also enter a password using the camera
number buttons on the front panel of the recorder.
Press the camera number buttons 1 to 9 to enter
numbers 1 to 9 respectively. Press the camera number
button 10 to enter 0.
Step
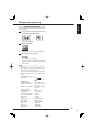
5 In [Confirm], enter the password same as you
entered in [Set].
Notice
• Enter the same number in [Set] and [Confirm]. If
you enter a different number, the password already
entered is canceled and you are required to start from
step 4 again.
• It is not necessary to set passwords for all three levels
(Level 1 to 3). You may set passwords for desired
levels only.
Enabling the password lock
Step
1 Press the LOCK button while the MAIN switch is
set to ON.
•
The lock is enabled and the LOCK indicator
illuminates.
•
The password lock for HDD protection becomes
enabled when you enter a password and close the
setting screen.
The password lock for HDD protection locks the data
in the Main device only. It does not lock the data in
the Copy device.
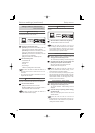
Disabling the password lock
Password for restricting operations (Levels 1 to 3)
Step
1 Press and hold down the LOCK button for 2
seconds or longer to display the screen for
disabling the lock.
•
When the menu operation is locked, the screen for
disabling the lock is displayed as you try to display a
locked menu.
Tips
• When the MAIN switch on the rear panel is set to ON,
you can disable the password lock even though the
POWER button on the front panel of the recorder is
off.
When the password lock is enabled with the power
of the recorder off, you can disable the lock using the
LCD on the front panel of the recorder. When you
press and hold down the LOCK button for 2 seconds
or longer, the LCD displays the menu for unlocking.
Enter the password using the camera number buttons
and press the LOCK button. The recorder is unlocked
and you can turn on the power. When you want to
cancel the unlocking procedure halfway, press the
LOCK button again.
Step
2 Enter a password for the desired level by
pressing the number buttons.
•
The lock is disabled and the normal screen is
displayed.