


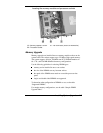


4-6
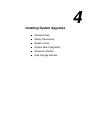
Installing System Upgrades
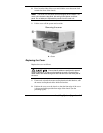
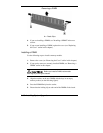
3.
Align the tabs on the sides of the cover with the corresponding slots
on the bottom edges of the chassis sides.
4.
Firmly press the cover against the chassis and slide the cover towards
the back of the chassis until it locks in place.
Note
If the cover does not slide all the way to the rear of the chassis,
check that the cover tabs on the sides of the cover are properly inserted
into their slots in the chassis. Also check that the tab on the riser board is
positioned inside the chassis (see “Installing an Expansion Board” later in
this chapter for tab location).
5.
Secure the cover with the previously removed cover screw and anti-
theft ring.
6.
If you have a padlock for the anti-theft ring on the rear of the chassis,
install it.
7.
If you are using the system as a slimtower, reinstall the stabilizers.
8.
Reconnect all external peripherals.
9.
Plug in your power cables.
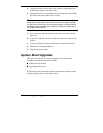
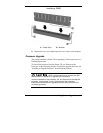
System Board Upgrades
This section describes how to install upgrades on the system board.
Procedures described in this section include:
adding memory modules
upgrading the processor.
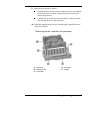
The following figure shows the locations of the memory module sockets
and the processor socket on the system board.