


4-14
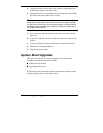
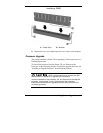
Installing System Upgrades
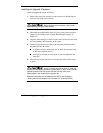
Installing an Upgrade Processor
Install the upgrade processor as follows.
1.
Remove the processor currently in your system (see “Removing the
Processor” in the previous section).
Before picking up the processor, reduce static
discharge by touching the metal chassis.
2.
Determine the manufacturer (Intel or Cyrix) of the processor and set
jumper J23 accordingly (see “System Board Jumper Settings” in
Chapter 3).
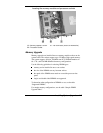
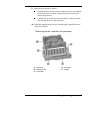
3.
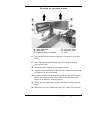
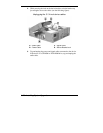
Align the white triangle (or notch) on the corner of the processor with
the corresponding white triangle on the socket.
4.
Carefully align the processor pins with the socket pin holes and set
the processor into the socket.
If aligned correctly and the pins are not bent, the processor seats
in the socket without forcing.
If the processor does not seat, check for correct alignment and
bent pins.
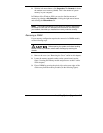
5.
Pivot the lever down and press it in towards the socket until it locks
in place.
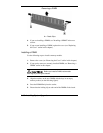
Using the wrong heat sink or fan or no heat sink
and fan can damage the processor, system board, or both. Ensure that the
upgrade processor has the correct heat sink and fan (refer to the
documentation that comes with the upgrade kit).
Additional information can be obtained from NECC (see Chapter 6,
“Getting Services and Support” for information on contacting NECC).