Connecting the FVX538 to the Internet 2-1
v1.0, August 2006
Chapter 2
Connecting the FVX538 to the Internet
Typically, six steps are required to complete the basic connection of your firewall. Setting up VPN
tunnels are covered in Chapter 5, “Virtual Private Networking.”
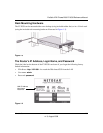
1. Connect the firewall physically to your network. Connect the cables, turn on your router
and wait for the Test LED to go out. Make sure your Ethernet and LAN LEDs are lit. (See the
Installation Guide, FVX538 ProSafe VPN Firewall 200 for complete steps. A PDF of the
Installation Guide is on the NETGEAR website at: http://kbserver.netgear.com.)
2. Log in to the firewall. After logging in, you are ready to set up and configure your firewall.
You can also change your password and enable remote management at this time.
3. Configure the Internet connections to your ISP(s). During this phase, you will connect to
your ISPs. You can also program the WAN traffic meters at this time if desired.
4. Configure the WAN mode (required for dual WAN operation). Select either auto-rollover
mode or load balancing mode (on a mutually exclusive basis). For load balancing, you can
also select the protocol bindings.
5. Configure dynamic DNS on the WAN ports (if needed). Configure your fully qualified
domain names during this phase (if required).
6. Configure the WAN options (if needed). Optionally, you can enable each WAN port to
respond to a ping. You can also change the factory default MTU size, port speed, and uplink
bandwidth. However, these are advanced features and changing them is not usually required.
Logging into the VPN Firewall
To connect to the firewall, your computer needs to be configured to obtain an IP address
automatically via DHCP. If you need instructions on how to configure you computer for DHCP,
refer to the link in Appendix B, “Related Documents.
To log in to the VPN firewall:
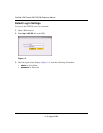
1. Connect to the firewall by typing http://192.168.1.1 in the address field of Internet Explorer,
Mozilla Firefox or Netscape® Navigator.


