172
Printing
The printer properties dialog box closes.
7. Make print settings, and then click [OK].
z
p.152 "Two Types of Printer Properties Dialog Box"
Changing the Dither Pattern
A dither pattern is a pattern of dots used to simulate a colour or shade of an image. If the pattern is changed, the
characteristics of the image will also change. Follow the procedure below to select a pattern suitable for the
image to be printed.
Dithering is a technique where tiny dots are printed in patterns in order to create the illusion of tones and colours
that cannot be physically reproduced.
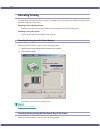
1. Open the file you want to print from the application, and then open the printer properties dialog
box.
2. On the [Print Settings] tab, click [User settings] in the [Print Quality] area.
If the dialog box type is Multi-tab, click [User settings] in the [Print Quality] area on the [Setup] tab.
3. Click [Change...].
The [Change User Settings] dialog box appears.
4. On the [Image Adjustments] tab, select a dither pattern in the [Dithering] list.
Thin lines may break depending on the pattern used. If this happens, select another pattern.
5. Click [OK].
The [Change User Settings] dialog box closes.
6. Make the necessary settings, and then click [OK].
The printer properties dialog box closes.
7. Make print settings, and then click [OK].
z
p.152 "Two Types of Printer Properties Dialog Box"
z
For details about [Dithering], see the printer driver Help.
Using Error Diffusion
Error Diffusion is a type of dithering that produces halftones by printing dots densely for dark colours and dif-
fusely for light colours. Select the appropriate pattern for the image you want print.
z
Depending on the operating system or application, error diffusion may not be printed correctly.
1. Open the file you want to print from the application, and then open the printer properties dialog
box.
2. On the [Print Settings] tab, click [User settings] in the [Print Quality] area.
If the dialog box type is Multi-tab, click [User settings] in the [Print Quality] area on the [Setup] tab.
3. Click [Change...].


