230
Using a Printer Server
7. Click [NetWare Settings].
Setup items are as follows.
z
Netware: Set Netware to enable or disable.
z
IPX Protocol: Set IPX Protocol to enable or disable.
z
Network Frame Type: Select the frame type to be used.
z
Operation Mode: Select whether the network interface board is to be used as a print server or as a
remote printer.
z
Print Server Name: Enter the NetWare print server name. To use network interface board as a print
server, enter the name of a print server that is not active on the file sever.
Use up to 47 single-byte characters.
z
Login Password: Use same password as for NetWare login.
Use up to 31 single-byte characters.
z
Job Polling Interval (sec.): Set job polling interval.
Enter from 2-255 seconds.
z
NDS Tree: To use in NDS Mode, enter the NDS tree name to which you will be logging on.
Use up to 31 single-byte characters.
z
NDS Context Name: To use in NDS mode, enter the print server context.
Use up to 77 single-byte characters.
8. Change the setting and click [Apply].
9. Setup is complete.
To check whether the printer is operating as setup, enter the following from a command prompt.
F:> NLIST USER /A/B
When operating correctly, the print sever name will be displayed as connected user name.
If you cannot identify the printer you want to configure from the displayed printer name, check the printer
name against a "system summary" page printed from the printer to find required printer.
Setting up Using NWadmin
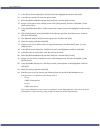
1. From Windows, start NWadmin.
2. Create a print queue. Select a print object, which produces a section object, or an organization
object from the directory tree, and click [Create] on the [Object] menu.
3. In the [Class of new object] box, click [Print Queue] to be highlighted, and then click [OK].
4. In the [Print Queue name] box, enter the name of the print queue.
5. In the [Print Queue Volume] box, click [Browse].
6. In the [Available objects] box, click the volume in which print queue was created, and then click
[OK].
7. Check the setting, and then click [Create].
8. Create a printer. Select section or organization object, and then click [Create…] on the [Object]
menu.
9. In the [Class of new object] box, click [Printer] to be highlighted, and then click [OK].
10. In the [Printer name] box, enter the printer name.


