


62
User's Reference
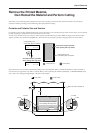
When printing is finished press the [SET UP] key, remove the material and carry out lamination (or whatever further processing
needs to be done).
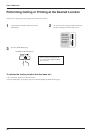
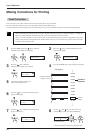
Load the material at the same pinch-roller positions used during printing, then press the [SETUP] key. At this time, load the material
so that the crop marks are to the inner sides of the pinch rollers on either side.
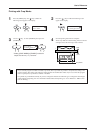
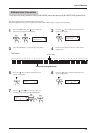
2
Follow steps 1 to 4 on the previous page to perform printing with crop marks.
1
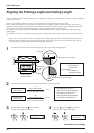
Install a blade holder on the cutting carriage.
3
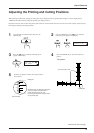
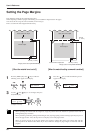
Set the base point.
Use the arrow keys to align the center of the blade at the location on
the crop mark shown in the figure, then press the [BASE POINT]
key.
4
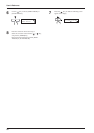
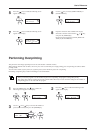
Set the align point. Use the arrow keys to line up the center of the
tool with one of the crop marks, then press the [ALIGN POINT]
key. You normally use the upper right crop mark for this. Line up the
center of the tool with the L-shaped mark as shown in the figure.
When you are printing something that is much wider than its length
and there is only a short distance between the base point and the
align point, it may be a good idea to set the align point at the lower
left crop mark.
5
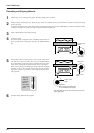
Base point
Center of the
blade
Send the cutting data from the computer.
6
Align point
Align point
(When printing something that
is much wider than its length)
Center of the
blade
Center of the
blade
Align the
center of
the blade
with the
base point
or the align
point.
* The align point cannot be set to both the lower left and
upper right points.
Reloading and Aligning Material