Step 1: Configure the LAN Interface
Defining the Subnets
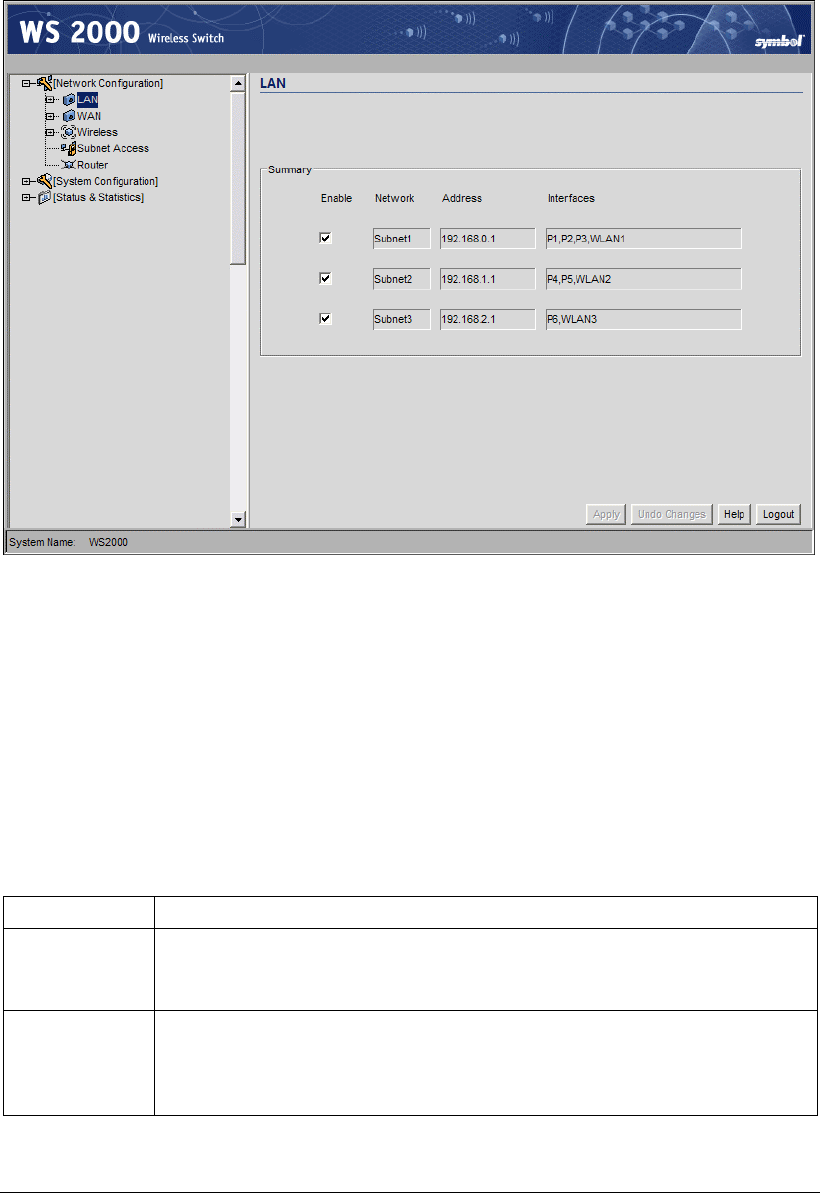
Select LAN under the Network Configuration group from the left menu. Use the LAN
configuration screen to view a summary of physical-port addresses and Wireless LANs
(WLANs) associated with the three supported subnets, and to enable or disable each
configured subnet.
1. In the LAN screen, the administrator can enable one, two or three subnets. Check the
checkbox to the left of the subnet to enable a subnet. Up to three subnets can be enabled
to use the wired and/or wireless connections of the switch-managed LAN. Enable
multiple subnets to divide the communications of different business areas or operations.
Each enabled subnet shows up in the directory tree in the left column of the
configuration screens. Consider disabling a previously configured subnet if its assigned
ports are no longer in use, or to consolidate the LAN’s communications on fewer
subnets.
2. Click Apply to save changes—all “unapplied” changes are lost when the administrator
moves to a new screen. The rest of the information on this screen is summary
information— it is collected from other screens (such as the subnet configuration
screens) where the administrator can set the data.
Field Description
Network
Network (subnet) name is a descriptive string that should describe the
subnet’s function. The WS 2000 Network Management System uses
subnet names throughout the configurations screens.
Address
This IP address allows users from outside the subnet (whether from
the WAN or from another subnet from the same switch) to access the
right subnet. An IP address uses a series of four numbers that are
expressed in dot notation, for example, 194.182.1.1.
Copyright © 2004 Symbol Technologies, Inc. All Rights Reserved 22
WS 2000 Wireless Switch: 1.0 Date of last Revision: March 2004


