


3-24 INSTALLING AND OPERATING THE MODULE
Using the DMM to
Verify Network
Connections
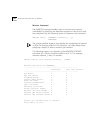
The DMM enables you to verify each network connection – both active
and isolated – for all CoreBuilder 5000 modules and monitor cards
installed in your hub. To initiate the verification process, you must
press the Display Control Toggle button on the front of the module.
Once you press this button, the DMM sequentially cycles through each
network connection (Ethernet 1-8 or Isolated 1-8) and lights each
status LED associated with the network indicated on the DMM LCD
display. If you attach an Ethernet network monitor card to a network,
the Module Status LED lights. The following example illustrates this
process.
Verifying Network
Connections for the
24-Port Module
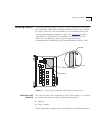
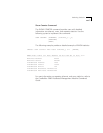
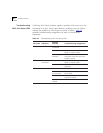
Administrator Jim Johnson needs to verify network connections for his
newly installed 24-Port module. Currently, Johnson has one 24-Port
module connected to Ethernet Networks 1 and 3 (E1 and E3). To verify
this configuration, Johnson presses the Display Control Toggle button
located on the front of his DMM. Once initiated, the DMM cycles
through each network connection (E1 and E3) and performs the
following:
■ displays the current network under examination (as shown on the
DMM LCD display)
■ lights the status LEDs associated with the current network
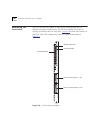
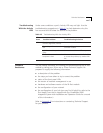
Since Johnson’s 24-Port module is connected only to E1 and E3, the
network verification will only light those status LEDs associated with
those networks. Conversely, if Johnson had configured the 24-Port
module with connections to all eight backplane networks, the network
verification process would cycle through all eight networks.
Where To Go From
Here
Once you complete Chapter 3, proceed to Chapter 4. Chapter 4
provides detailed information on troubleshooting and technical
assistance. If you have problems installing your 24-Port module, you
should refer to these chapters prior to contacting customer support.