


53
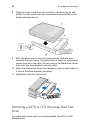
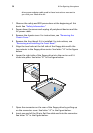
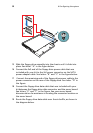
2 Power down the server and unplug all peripheral devices and the
AC power cable.
3 Remove the chassis cover. For instructions, see “Removing the
Chassis Cover.”
4 Remove the front bezel if it is installed. For instructions, see
“Removing and Installing the Front Bezel.”
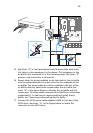
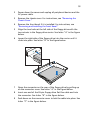
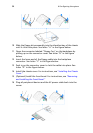
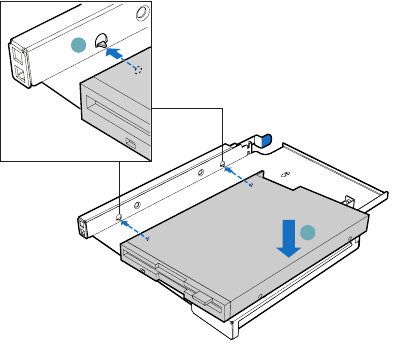
5 Align the two holes at the left side of the floppy drive with the
two cutouts in the floppy drive carrier. See letter “A” in the figure
below.
6 Lower the right side of the floppy drive into the carrier until it
clicks into place. See letter “B” in the figure below.
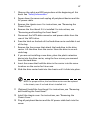
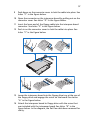
7 Open the connector on the rear of the floppy drive by pulling up
on the connector cover. See letter “A” in the figure below.
8 Insert one end of the 26-pin floppy drive flat flex cable end into
the connector. See letter “B” in the figure below.
9 Push down on the connector cover to lock the cable into place. See
letter “C” in the figure below.
A
B