85
Installing the Heat Sink(s)
1 The heat sink has Thermal Interface Material (TIM) located on the
bottom of it. Use caution when you unpack the heat sink so you do
not damage the TIM.
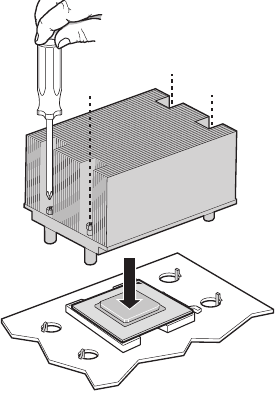
2 Set the heat sink over the processor, lining up the four captive
screws with the four posts surrounding the processor.
3 Loosely screw in the captive screws on the heat sink corners in a
diagonal manner (screw in one screw, then the screw located
diagonally to the first screw). Do not fully tighten one screw
before tightening another.
4 Gradually and equally tighten each captive screw until each is
firmly tightened. Do not over-tighten the screws.
5 Reinstall and reconnect any parts you removed or disconnected to
reach the processor sockets.
6 Replace the server’s cover and reconnect the AC power cord. See
the documentation that accompanied your server chassis for
instructions on installing the server’s cover.


