


4 Configuring the system
60
Removing a Floppy Drive from the Slimline Bay
(No Backplane Installed)
1 Observe the safety and ESD precautions at the beginning of this
book. See “Safety Information.”
2 Power down the server and unplug all peripheral devices and the
AC power cable.
3 Remove the chassis cover. For instructions, see “Removing the
Chassis Cover.”
4 Remove the front bezel if it is installed. For instructions, see
“Removing and Installing the Front Bezel.”
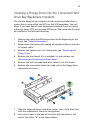
5 Detach the power and data cables from the rear of the floppy
drive.
6 Detach the data cable from the server board and remove the cable
from the chassis.
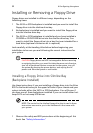
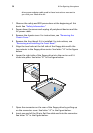
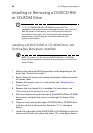
7 Push in on the blue lever at the rear of the drive carrier.
8 Slide the floppy drive carrier out through the front of the chassis.
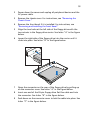
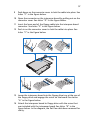
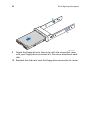
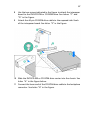
9 Remove the screw that attaches the interposer board to the drive.
Lift the interposer board from the drive.
10 Remove the flat flex cable from the floppy drive and from the
interposer board.
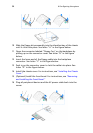
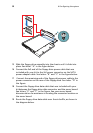
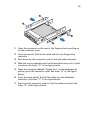
11 Press downward on the side of the carrier to release the drive from
the drive carrier.
12 Store the floppy drive carrier, the interposer board, the flat flex
cable, and the floppy drive data cable for future use.
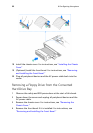
13 Install the slimline filler panel into slimline bay if no drive is to be
installed into the bay.
14 Install the chassis cover. For instructions, see “Installing the Chassis
Cover.”
15 (Optional) Install the front bezel. For instructions, see “Removing
and Installing the Front Bezel.”
16 Plug all peripheral devices and the AC power cable back into the
server.