


Controller Installation
007-5510-002 17
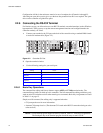
The controller supports various disk drive enclosures that can be used to populate the 10
<ABCDEFGHPS> disk channels in both SAS 1x and SAS 2x modes. Each chassis has a limit to the tiers
that can be created and supported. Refer to the specific disk enclosure user guides for further information.
You can create up to 1024 LUNs in a controller. LUNs can be shared or dedicated to individual users,
according to your security level setup, with Read or Read/Write privileges granted per user. Users only
have access to their own and “allowed-to-share” LUNs. Shared LUNs need to be managed by SAN
management software. Individual dedicated LUNs appear to users as local storage and do not require
external management software.
NOTE :
In dual mode, LUNs are “owned” by the controller unit on which they are created. Hosts only
see the LUNs on the controller to which they are connected, unless cache coherency is enabled.
For random I/O applications, use as many tiers as possible and create one or more LUNs. For
applications that employ sequential I/O, use individual or small grouping of tiers. If you need guidance
in determining your requirements, contact SGI support.
2.3.2 Configuration Interface
You can use the Command Line Interface (CLI) to configure the controller system. This user guide
provides information for setup using the CLI.
2.3.3 Login as Administrator
The default Administrator account name is admin and its default password is password. (See
Section 3.1.3 "Administrator and User Logins" for information on how to change the user and
administrator passwords.) Only users with administrator rights are allowed to change the configuration.
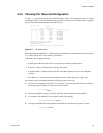
To login:
1. At the login prompt, type:
login admin
<Enter>
2. At the password prompt, type:
password
<Enter>
2.3.4 Setting System Time & Date
The system time and date for the controller are factory-configured for the U.S. Pacific Standard Time
(PST) zone. If you are located in a different time zone, you need to change the system date and time so
that the time stamps for all events are correct. In dual mode, changes should always be made on Unit 1.
New settings are automatically applied to both units.
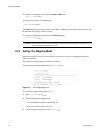
To set the system date, at the prompt, type:
date mm dd yyyy
<Enter>
where mm represents the two digit value for month, dd represents the two digit value for day, and yyyy
represents the four digit value for year.