


Chapter 9. Configuring Firewall/NAT Settings RX3141 User’s Manual
60
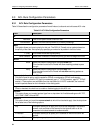
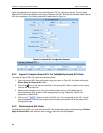
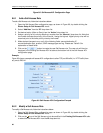
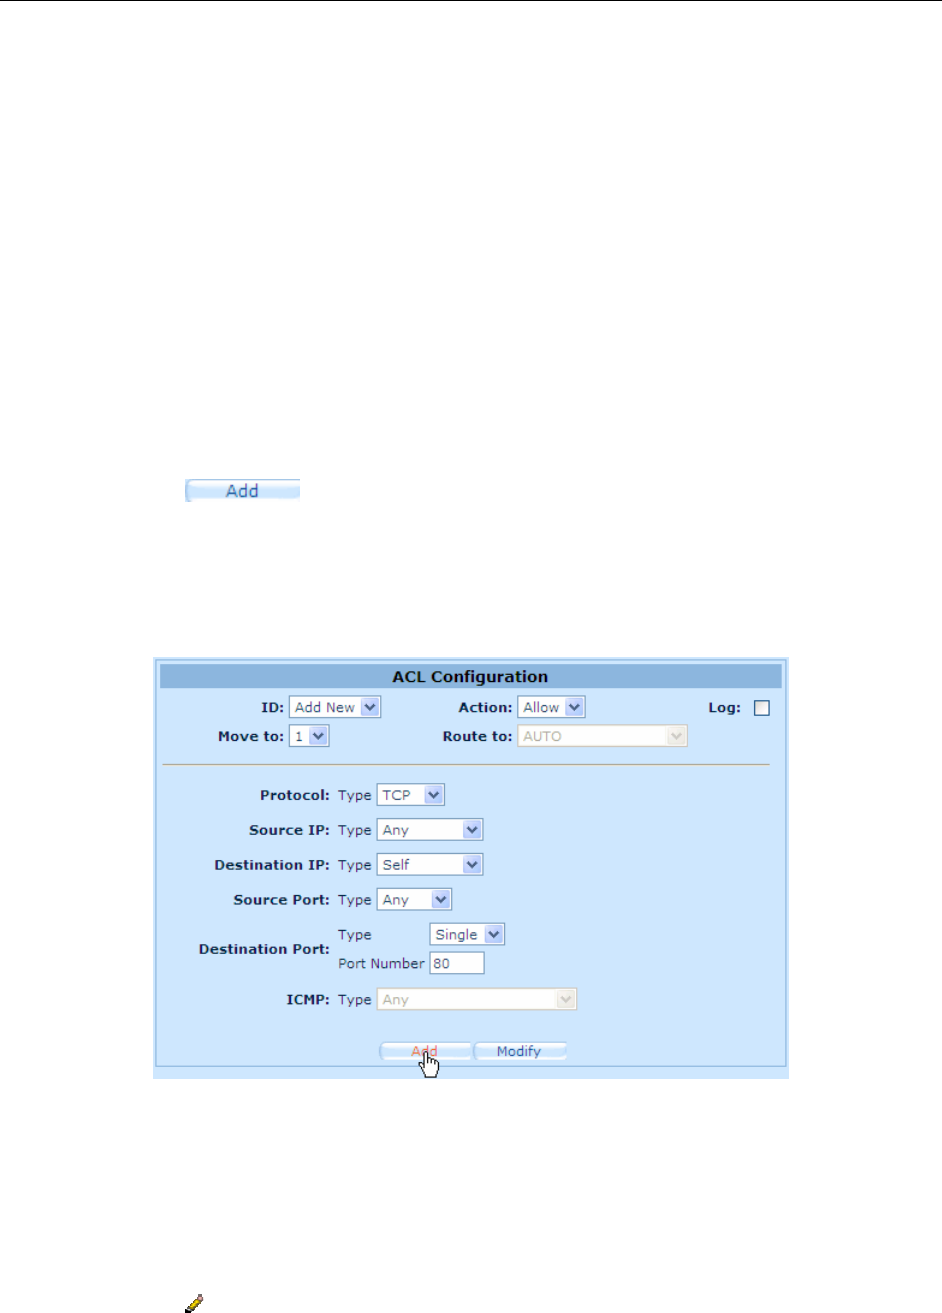
Figure 9.8. Self-Access ACL Configuration Page
9.6.1 Add a Self-Access Rule
To add a Self-Access rule, follow the instructions below:
1. Open the Self-Access Rule configuration page, as shown in Figure 9.8, by double clicking the
Router Setup
Î
Self Access ACL
menu.
2. Select “
Add New
” from the “
ID
” drop-down list.
3. Set desired action (Allow or Deny) from the “
Action
” drop-down list.
4. Assign a priority for this rule by selecting a number from the “
Move to
” drop-down list. Note that
the number indicates the priority of the rule with 1 being the highest. Higher priority rules will be
examined prior to the lower priority rules by the firewall.
5. Make desired changes to any or all of the following fields: source/destination IP,
source/destination port, protocol, ICMP message type and log. Please see Table 9.3 for
explanation of these fields.
6. Click on the
button to create the new Self-Access rule. The new rule will then be
displayed in the Existing Self-Access ACL list table at the bottom half of the Self-Access ACL
configuration page.
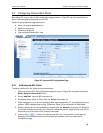
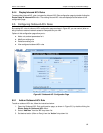
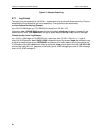
Example
Figure 9.9 shows a sample self-access ACL configuration to allow TCP port 80 traffic (i.e. HTTP traffic) from
any one to RX3141.
Figure 9.9. Self-Access ACL Configuration Example
9.6.2 Modify a Self-Access Rule
To modify a Self-Access rule, follow the instructions below:
1. Open the Self-Access Rule configuration page, as shown in Figure 9.8, by double clicking the
Router Setup
Î
Self Access ACL
menu.
2. Click on the
icon of the Self-Access rule to be modified in the
Existing Self-Access ACL
table
or select the Self-Access ACL from the
ID
drop-down list.