36 DCS-200 • User’s Guide
4. Operation
Quick Setup and Operations
nìáÅâ=pÉíìé=~åÇ=léÉê~íáçåë
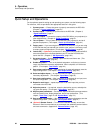
For the optimum speed in setting up and operating your system, use the following steps.
For reference, links are provided to the appropriate sections in this guide.
1. Connect power — Ensure that power is properly connected to the DCS-200.
(Chapter 3, “Power Installation
,” page 29.)
2. Connect inputs — Connect all input sources to the DCS-200. (Chapter 3,
“Signal Installation,” page 31.
3. Connect outputs — Connect the output(s) of the DCS-200 to your projector(s) or
other target devices. (Chapter 3, “Signal Installation,” page 31.
4. Turn on power — Turn on power to the DCS-200, your projector(s), and to all
peripheral equipment. (This chapter, “Power-Up Initialization,” page 34.)
5. Factory reset — If you are using the DCS-200 for the first time, or if you are using
a DCS-200 that has just returned from another event, perform a full factory reset
to restore system configurations. (This chapter, “Factory Reset
,” page 82.)
6. Launch GUI — (Optional) If you want to run the system from the web-based GUI,
ensure that Ethernet is connected between your PC and the DCS-200, then
launch the GUI. (Chapter 5, “GUI Operations,” page 103.)
7. Set output format — Set the desired output resolution and frame rate. (This
chapter, “Output Format,” page 48.)
8. Enable test pattern — Turn on the desired test pattern, verify that you have an
image, and make the necessary adjustments. When complete, turn off the test
pattern. (This chapter, “Test Pattern,” page 48.)
9. Save output configuration — After completing all output adjustments, save the
output configuration. (This chapter, “Save Output Config,” page 49.)
10. Select and adjust inputs — As required, select an input, and perform the
necessary adjustments. (This chapter, “Input Menu,” page 53.)
11. Save input configuration — After completing all adjustments for an input, save
the input configuration. (This chapter, “Save Config,” page 64.)
12. Repeat for each input — repeat steps 9 and 10 for each input that you have
connected to the DCS-200.
13. Adjust key source — As required, select the desired key source, and adjust its
clip, gain and opacity. (This chapter, “Using Keys
,” page 95.)
14. Adjust system parameters — As required, adjust all desired system parameters
such as transition time, display brightness, and all user preferences. (This
chapter, “Trans Time
,” page 47 and “System Menu,” page 73.)
15. Save system configuration — After completing all system adjustments, save the
system configuration. (This chapter, “Save System State,” page 81.)
16. (Optional) Remote Control — To control the DCS-200 remotely, ensure that
Ethernet or Serial communications are connected, then establish communications
and issue commands. (Appendix B, “Remote Control
,” page 127.)


