4. Stacking FLM projectors
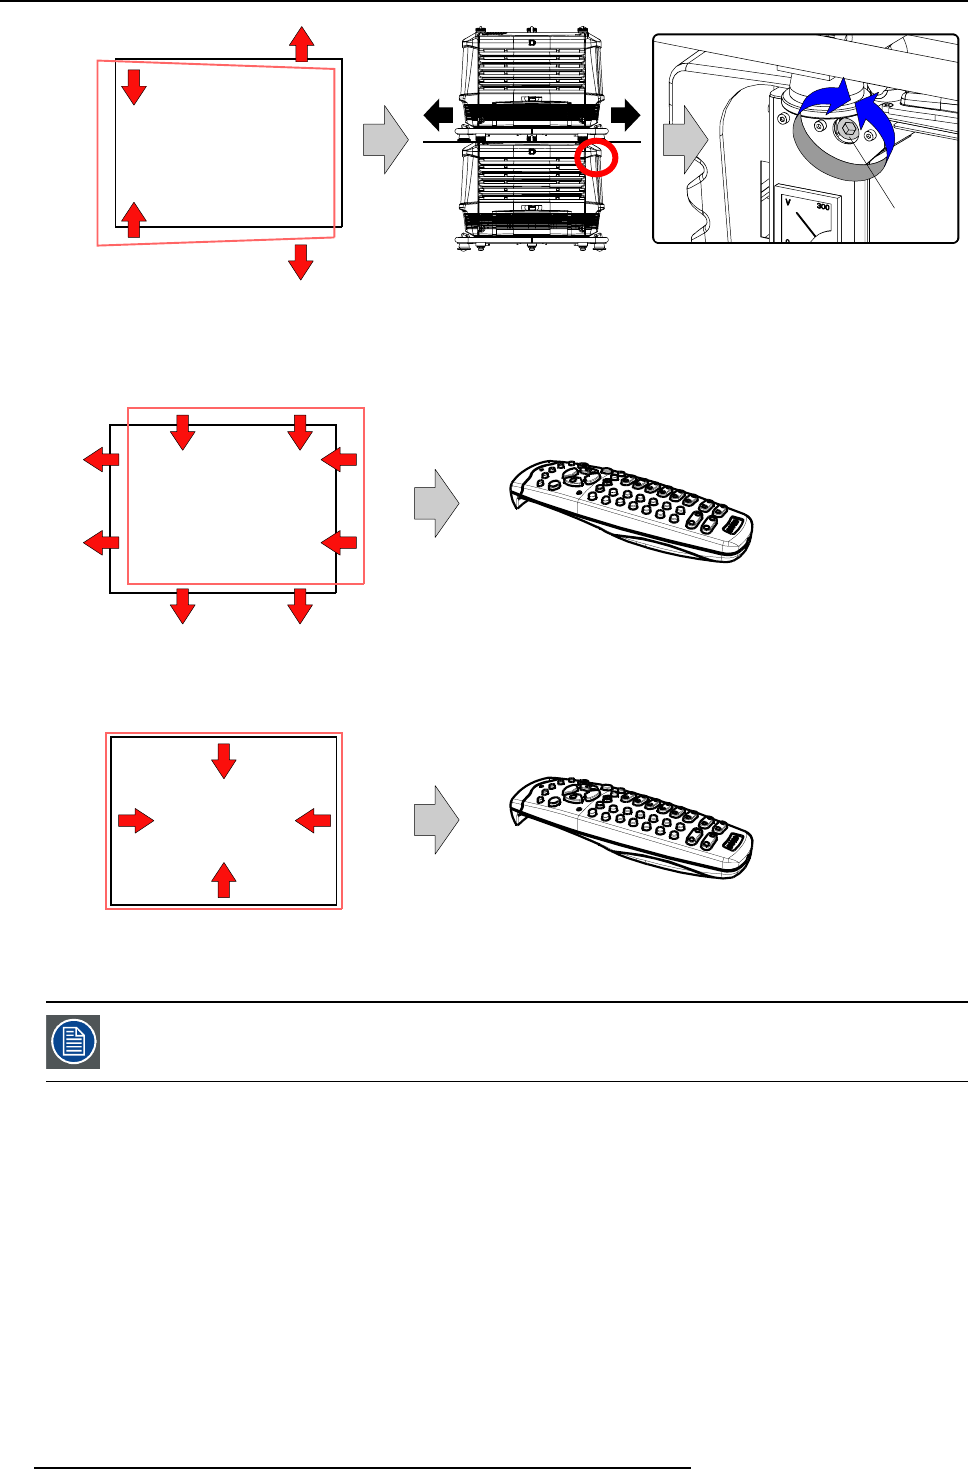
Skew
Q
Image 4-8
6. Shift the hatch pattern horizontally and vertically until the outline of the hatch pattern is
most symmetrically placed with respect
to the reference hatch pattern.
Note: Note that the “Shift” function is motorized, which means that you have to access the projector software, via the local
keypad or remote control unit, to operate the “Shift” function.
Shift
Image 4-9
7. Zoom the hatch pattern in or out until the outline of the hatch pattern matches exactly the outline of the reference hatch pattern.
Note: Note that the “Zoom” function is motorized, which means that you have to access the projector software, via the local
keypad or remote control unit, to operate the “Zoom” function.
Zoom
Image 4-10
8. If necessary, repeat from step 2 until the hatch pattern of the stacked projector is perfectly aligned with the hatch pattern of the
reference projector.
In case of a triple stacked table mount projector configuration adjust and align first the bottommost projector
(reference), than the projector in the middle and finally the uppermost projector.
34 R59770017 FLM HD14 15/03/2010


