


2-18
Cisco Physical Access Gateway User Guide
OL-20932-02
Chapter 2 Installing and Configuring the Cisco Physical Access Gateway
Configuring and Managing the Gateway Using a Direct Connection
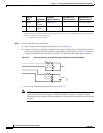
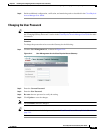
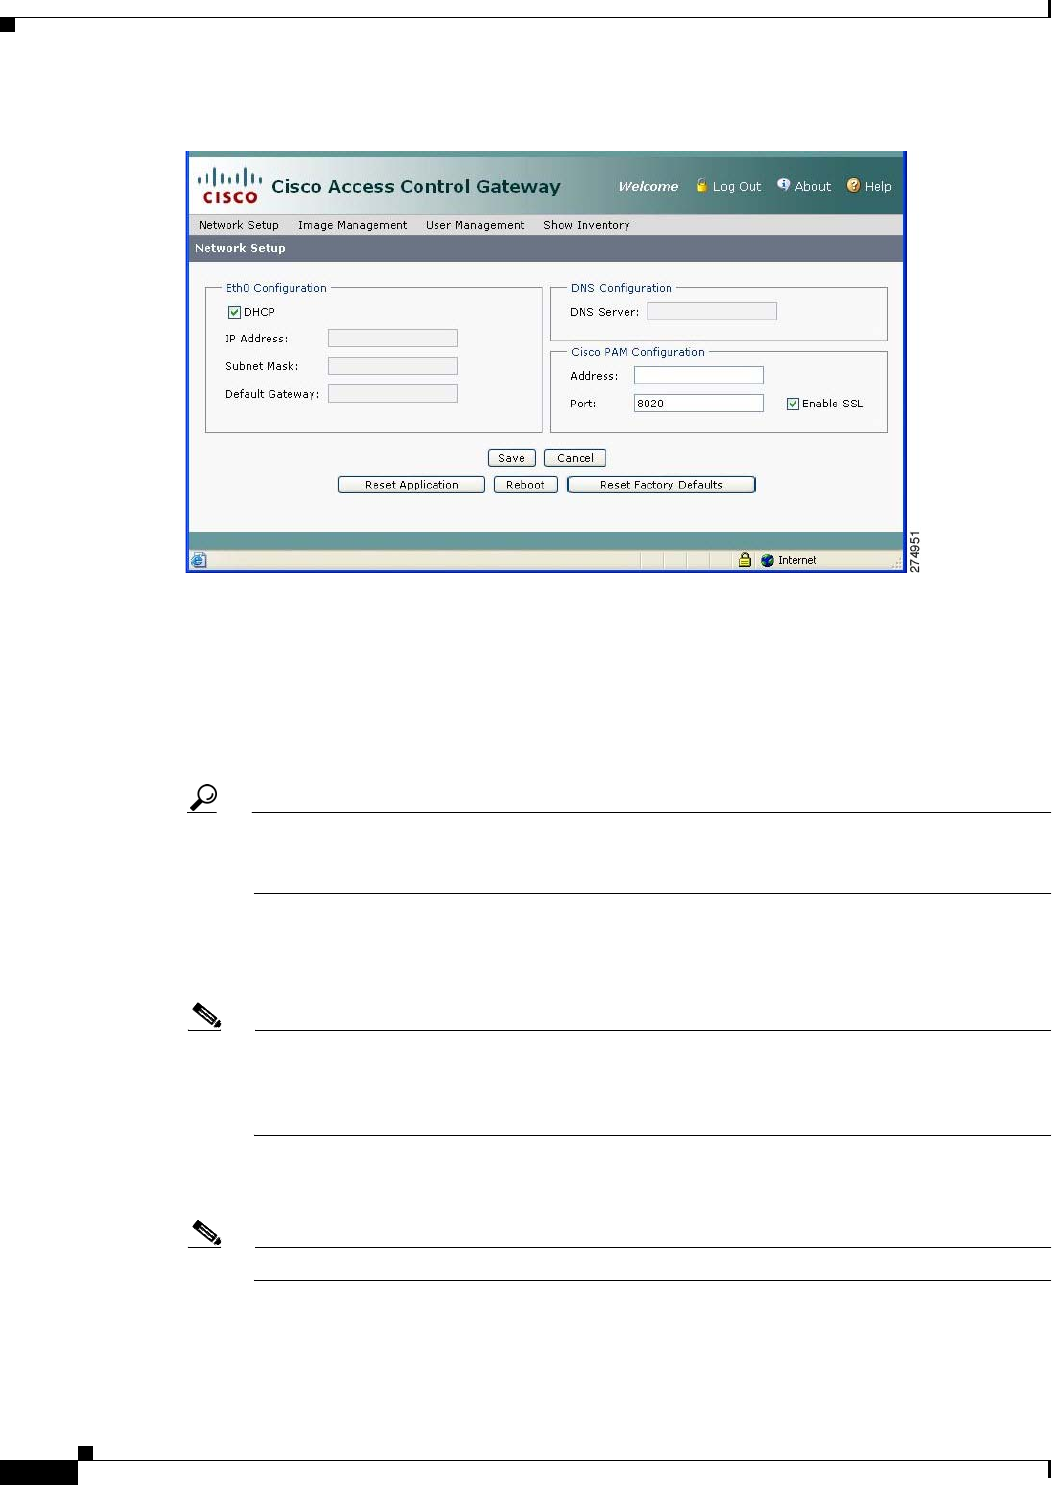
Figure 2-13 Network Settings for the Cisco Physical Access Gateway
Step 2
(Optional) Enter the DNS Server address if names (not IP addresses) are used for the CPAM address.
Step 3 Enter the Cisco PAM Configuration:
a. Enter the Cisco PAM IP Address (IP address or name) to enable Gateway communication with the
appliance.
b. Enter the Port number for the Cisco PAM appliance. The port number must be greater than 1024
and less 65535. The default is 8020.
Tip DHCP can also be configured to supply the Gateway with the IP address of the Cisco PAM
appliance by configuring option 150 in the DHCP response. The Cisco PAM appliance TCP port
number can be provided by DHCP option 151 of the DHCP response.
c. Enable SSL: The secure socket layer (SSL) is enabled for secure communication between the
Gateway and Cisco PAM appliance by default. If necessary SSL can be disabled by unchecking the
Enable SSL check box.
Note SSL is enabled by default on all Gateways and Cisco PAM appliances. If SSL is disabled for a
Gateway but enabled for Cisco PAM, the Gateway will not be able to connect to the appliance.
If the SSL settings are changed, reset all Gateways and the Cisco PAM appliance. We
recommend enabling SSL to ensure secure communications.
Step 4 Click Save to save the settings. Wait until the Gateway resets and the web browser displays the screen
Network Settings Applied.
Note Changes do not take effect until saved.
Step 5 Repeat Step 1 through Step 4 for each Gateway in the system.