


108 Adding and Replacing Parts
www.dell.com | support.dell.com
Battery
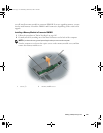
Removing a Battery
CAUTION: Before performing these procedures, disconnect the modem from the telephone wall jack.
NOTICE: If you choose to replace the battery with the computer in standby mode, you have up to
1 minute to complete the battery replacement before the computer shuts down and loses any unsaved
data.
1
Ensure that the computer is turned off or suspended in a power management mode.
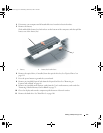
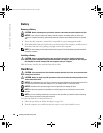
2
Slide and hold the battery-bay latch release on the bottom of the computer, and then remove
the battery from the bay by pulling it straight out from the computer.
NOTE: The 6-cell battery is flush with the back of the computer. The 9-cell battery extends beyond the
back of the computer.
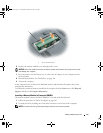
Installing a Battery
CAUTION: Using an incompatible battery may increase the risk of fire or explosion. Replace the
battery only with a compatible battery purchased from Dell. The battery is designed to work with your
Dell computer. Do not use a battery from other computers with your computer.
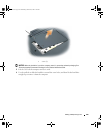
Slide the battery into the bay until the latch release clicks.
Hard Drive
CAUTION: If you remove the hard drive from the computer when the drive is hot,
do not touch
the metal
housing of the hard drive.
CAUTION: Before you begin any of the procedures in this section, follow the safety instructions in the
Product Information Guide
.
NOTICE: To prevent data loss, turn off your computer (see page 105) before removing the hard drive. Do
not remove the hard drive while the computer is on, in standby mode, or in hibernate mode.
NOTICE: Hard drives are extremely fragile; even a slight bump can damage the drive.
NOTE: Dell does not guarantee compatibility or provide support for hard drives from sources other
than Dell.
NOTE: If you are installing a hard drive from a source other than Dell, you need to install an operating
system, drivers, and utilities on the new hard drive.
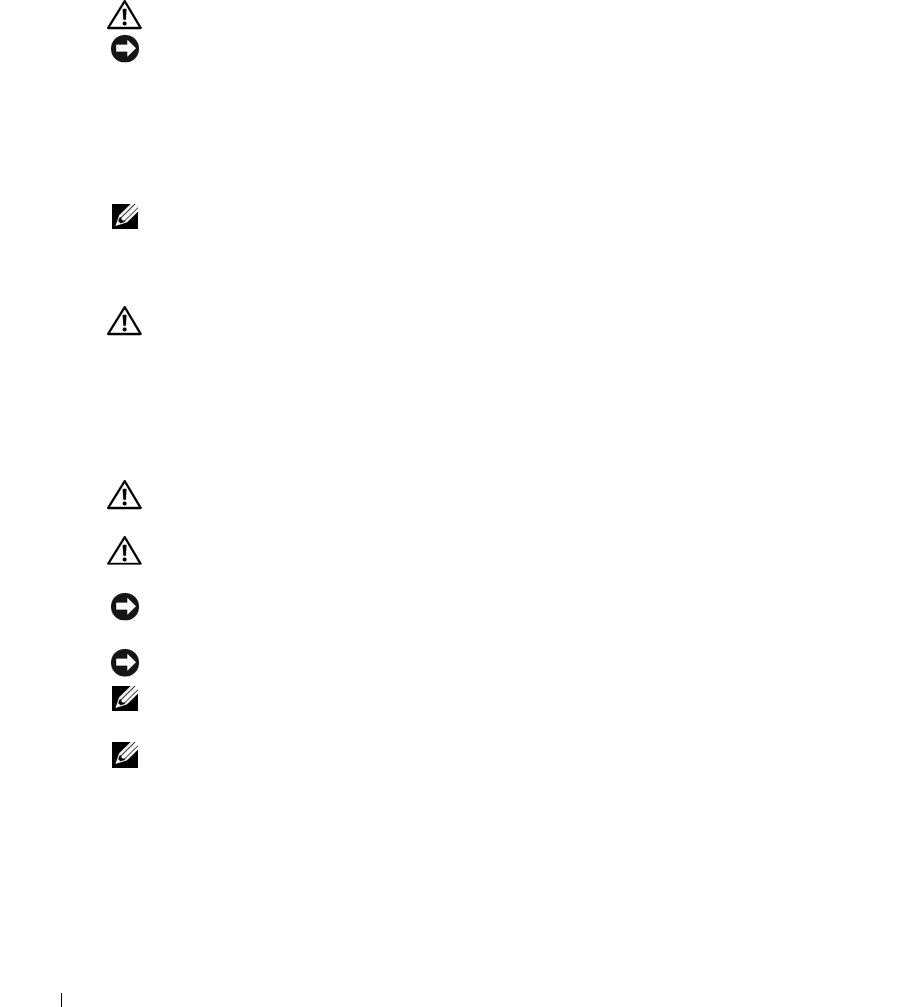
To replace the hard drive in the hard drive bay:
1
Follow the procedures in "Before You Begin" on page 105.
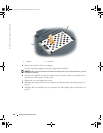
2
Turn the computer over, and loosen the two captive screws in the hard drive cover.
book.book Page 108 Wednesday, October 26, 2005 1:00 PM