


Installing System Components 115
CAUTION: Only trained service technicians are authorized to remove the system
cover and access any of the components inside the system. See your Product
Information Guide for complete information about safety precautions, working
inside the computer, and protecting against electrostatic discharge.
1
Turn off the system, including any attached peripherals, and disconnect
the system from the electrical outlet.
2
Open the system. See "Opening the System" on page 65.
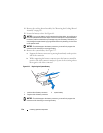
3
Ground yourself by touching an unpainted metal surface on the back of
the system, unpack the drive, and compare the jumper and switch settings
with those in the documentation that came with the drive.
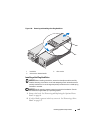
4
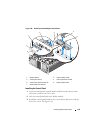
Install the Fibre Channel HBA in an expansion slot. See "Installing an
Expansion Card" on page 78.
5
Connect the end of the Fibre Channel cable to the connector on the HBA
card bracket.
6
Close the system. See "Closing the System" on page 66.
7
Reconnect the system and peripherals to their electrical outlets, and turn
them on.
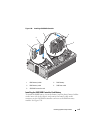
System Battery
The system battery is a 3.0-volt (V), coin-cell battery.
Replacing the System Battery
CAUTION: Only trained service technicians are authorized to remove the system
cover and access any of the components inside the system. See your Product
Information Guide for complete information about safety precautions, working
inside the computer, and protecting against electrostatic discharge.
CAUTION: There is a danger of a new battery exploding if it is incorrectly
installed. Replace the battery only with the same or equivalent type recommended
by the manufacturer. Discard used batteries according to the manufacturer's
instructions. See your System Information Guide for additional information.
1
Turn off the system, including any attached peripherals, and disconnect
the system from the electrical outlet.
2
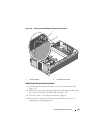
Open the system. See "Opening the System" on page 65.
3
Remove the PEM. See "Removing the PEM or PEM Shell" on page 73.