


Installing System Components 91
8
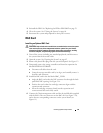
Close the system. See "Opening the System" on page 65.
9
Reconnect the system to power and restart the system.
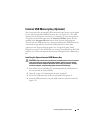
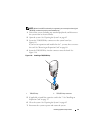
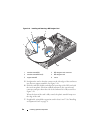
Removing the NIC Daughter Card
CAUTION: Only trained service technicians are authorized to remove the system
cover and access any of the components inside the system. See your Product
Information Guide for complete information about safety precautions, working
inside the computer, and protecting against electrostatic discharge.
1
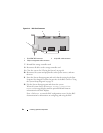
Turn off the system, including any attached peripherals, and disconnect
the system from the electrical outlet.
2
Open the system. See "Opening the System" on page 65.
3
If you have expansion cards installed in slots 6 and 7, you must remove the
cards temporarily to remove the NIC card. See "Removing an Expansion
Card" on page 80.
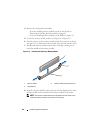
4
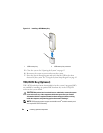
Pull back slightly on the two blue retention standoff tabs at the front edge
of the card and gently lift the edge of the NIC card off of the standoffs.
As the card releases from the standoffs, the connector under the NIC card
disengages from the system board connector.
5
Slide the card back from the two support standoffs and lift the card out of
the system.
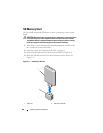
System Memory
You can upgrade your system memory to a maximum of 128 GB (two-
processor configurations) or 256 GB (four-processor configurations) by
installing sets of 512-MB, 1-GB, 2-GB, 4-GB, or 8-Gb (when available)
memory modules. 667-MHz registered DDR-II memory modules are
supported in all memory sizes. 2-GB and 4-GB (when available) 800-Mhz
memory modules are also supported in restricted configurations.
Sixteen memory sockets are located on the system board under the cooling
shroud assembly. In four-processor systems, sixteen additional sockets are
located on the processor expansion module board (PEM). Each processor has
two memory channels, organized in sets of four memory module slots per
channel.