


4-8 Dell Dimension XPS H233 and XPS H266 Systems Service Manual
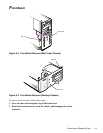
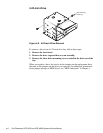
Lower 3.5-Inch Drive (Mini Tower Computer Only)
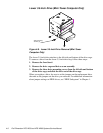
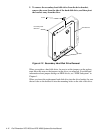
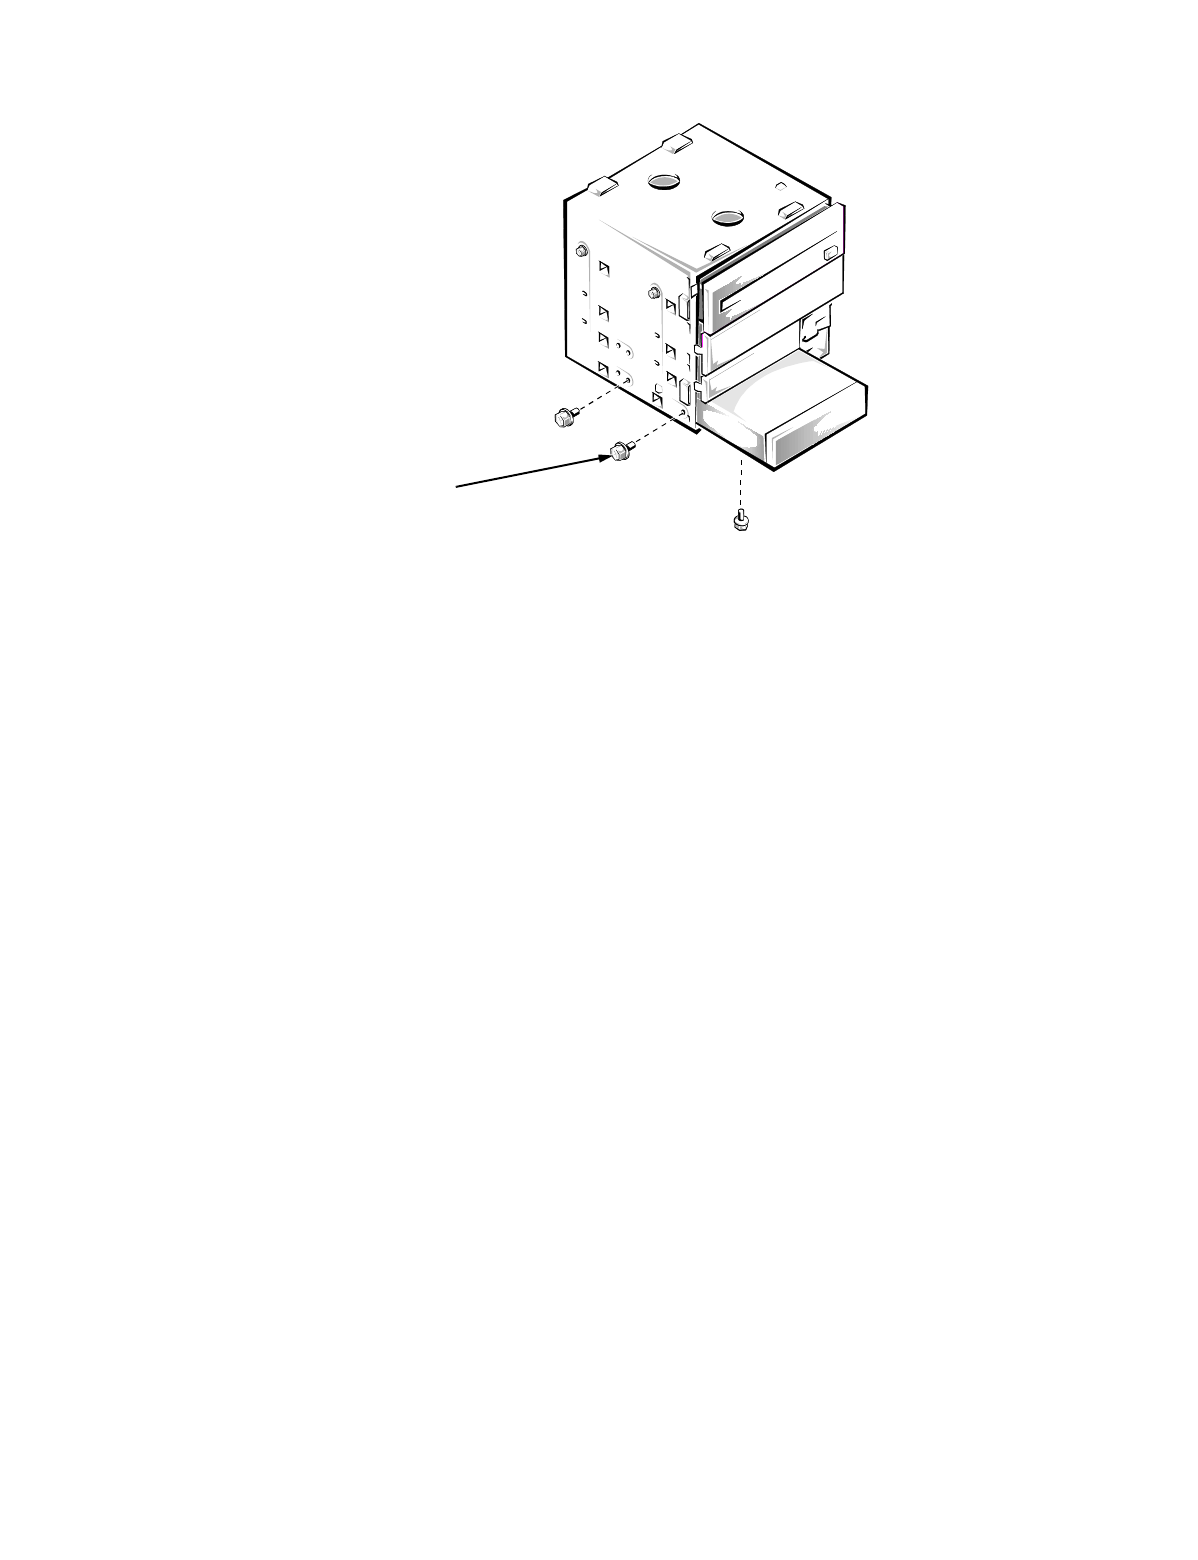
Figure 4-8. Lower 3.5-Inch Drive Removal (Mini Tower
Computer Only)
The lower 3.5-inch drive attaches to the left side and bottom of the drive cage.
To remove a drive from the lower 3.5-inch drive bay, follow these steps:
1. Remove the front bezel.
2. Remove the drive cage and drives as an assembly.
3. Remove the three drive-mounting screws from the left side and bottom
of the drive cage, and slide the drive out of the drive cage.
When you replace a drive, be sure to set the jumpers on the replacement drive
the same as the jumpers on the drive you removed. For additional information
about jumper settings on EIDE drives, see “EIDE Subsystem” in Chapter 1.
drive-mounting
screws (3)