


DES-3326 Layer 3 Fast Ethernet Switch User’s Guide
Remote Management Setup
Configuring the Switch’s IP Address
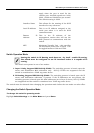
The BOOTP and DHCP Server options for assigning the switch an IP address and
subnet mask are only available when the switch is in Layer 2 Only mode. The IP
Routing mode requires a manual entry of the IP address and subnet mask.
The Switch needs to have an IP address assigned to it so that an In-Band network management system
(for example, the DView or Telnet) client can find it on the network. The IP Setup screen allows you to
change the settings for the Ethernet interface used for in-band communication.
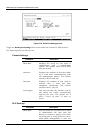
The fields listed under the Current Switch IP Settings heading are those that are currently being used
by the switch. Those fields listed under the Restart Settings heading are those which will be used after
the APPLY button is selected.
To set the switch’s IP address:
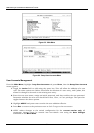
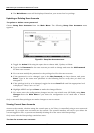
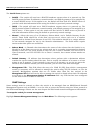
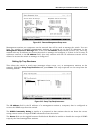
Highlight Remote Management Setup from the Main Menu and press Enter.
Figure 6-14. Remote Management Setup menu
The switch’s factory default IP address is 10.90.90.90 with a subnet mask of 255.0.0.0
and a default gateway of 0.0.0.0.
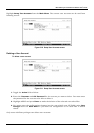
To manually assign the switch’s IP address, subnet mask, and default gateway
address:
Highlight the IP Address field and enter the appropriate IP address.
Highlight the Subnet Mask field and enter the appropriate subnet mask.
If you want to access the switch from a different subnet from the one it is installed on, highlight the
Default Gateway field and enter the IP address of the gateway. If you will manage the switch from the
subnet on which it is installed, you can leave the default address in this field.
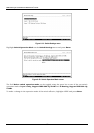
To use the BOOTP/DHCP protocols to assign the switch an IP address, subnet mask, and default
gateway address:
Toggle the Get IP From field using the space bar to choose from Manual, BOOTP, or DHCP. This selects
how the switch will be assigned an IP address on the next reboot (or startup).
98