


Data Dump Mode
The printer has a feature to find the cause of communication
problems between the printer and application programs. In data
dump mode a printout of the codes reaching the printer is
produced.
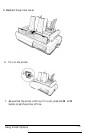
1.
To enter
the
data dump mode, hold down the
FORM FEED
and
LINE
FEED
buttons at the same time while you turn
on the
printer.
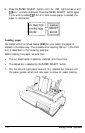
2. Next, run either an application program or one you
have
written in
any programming language. Your printer prints all the codes sent to
the
printer in hexadecimal format as
shown
below:
16
40
1B
52
00
16
74
01
18
50
18
70
00
.@.R..t..6..P.p.
20
20
54 68 69 73 20
6E
20 65
78
61
This
is
an
exa
6D
70
6C
65 20
6F
66
61
74
61
20 64
mple
of
a
data
d
75
6D
70 20
70 72
69
74
2E
20 54 68
ump
printout.
Th
69 73 20 66 65
61 74
20
6D
61 68
65
73
is
feature
makes
OA
20 20 20 20 20 69
5 61
73 79 20
66
6F
it easy
io
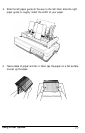
3.
To turn off
the
data dump mode, press the
ON LINE
button to take
the
printer off line, and then turn off the printer. (The data dump mode
can also be cancelled by sending an INIT signal from the computer.)
Look at
the
data dump shown in Step 2. By comparing the characters
printed in the right column with the printout of
the
hexadecimal codes,
you can check what codes are being sent to
the
printer. If characters are
printable, they appear as their true ASCII characters. Nonprintable
codes, such as control codes, are represented by dots.
As an example of how to interpret a data dump printout, look at the first
three hex codes on the second line of the printout sample (20 20 54). Each
hex
20 represents a space, while hex 54 represents
the
letter T Check the
second line of
the
right column and you will find the letter T preceded by
two spaces.
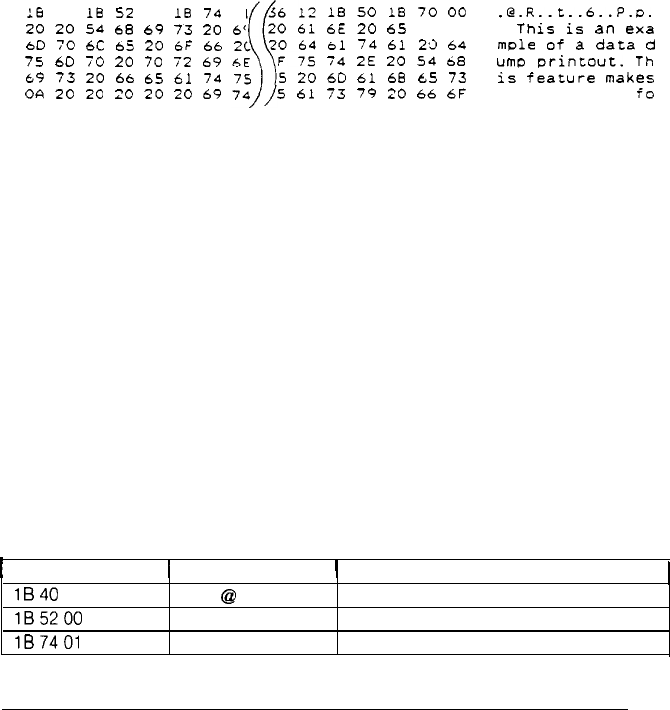
The chart below interprets part of the first line of codes:
1
Hex codes
1
Command
1
Function
lB40
ESC
@
lB5200
ESC RO
lB7401
ESC tl
Initialize printer
Select USA character set
Select Epson Extended Graphics
6-6
Troubleshooting