


HTML Control and IPL File Manager, cont’d
GSS 100 Graphic Still Store • HTML Control and IPL File Manager
GSS 100 Graphic Still Store • HTML Control and IPL File Manager
5-125-12
5-135-13
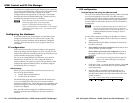
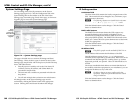
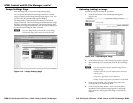
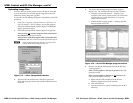
Passwords Page
Access the Passwords page (figure 5-7) by clicking the
Configuration tab and then the Passwords link on the left side of
the System Settings page.
System
Settings
Email Alerts
Firmware
Upgrade
Video Settings
Figure 5-7 — Passwords page
The fields on the Passwords page are for entering and verifying
administrator and user passwords. Passwords are case sensitive
and are limited to 12 uppercase and/or lowercase alphanumeric
characters. Each password must be entered twice; once in the
Password field and then again in the Re-enter Password field.
Characters in these fields are masked (•••••). If you do not
want to password protect an access level, leave the Password
field and the Re-Enter Password field blank. All changes made
on the Port Settings must be confirmed by clicking the Submit
button. Clicking the Cancel button abandons the changes.
N
To clear an existing password (so that no password is
required), enter a space in the Password and Re-enter
Password fields and click the Submit button.
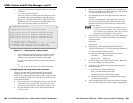
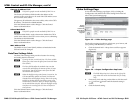
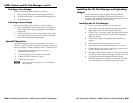
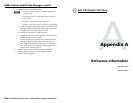
E-mail Alerts page
Access the E-Mail Alerts page (figure 5-8) by clicking the
Configuration tab and then the Email Alerts link on the left
side of the System Settings page. This page provides a way to
set the GSS to automatically send e-mail alert messages when
settings are changed on the GSS. You can enter up to 64 e-mail
recipients.
System
Settings
Passwords
Firmware
Upgrade
Video Settings
Figure 5-8 — E-Mail Alerts page
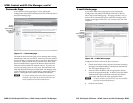
Configure the GSS to send e-mail alerts as follows:
1. On the Email Alerts screen, click the Edit button located to
the right of the Mail IP Address and Domain Name fields.
The Edit button changes to Save.
2. Enter the GSS’s IP address and the appropriate domain
name in the appropriate fields. If desired, select the SMTP
Authorization required checkbox and enter the desired
User Name and Password in the appopriate fields.
N
All of the variables and selections in step 2 are available
from your network administrator.)
3. Click the Save button.