3. OPERATION
Page 23 © 2004-2007 DH Instruments, a Fluke Company
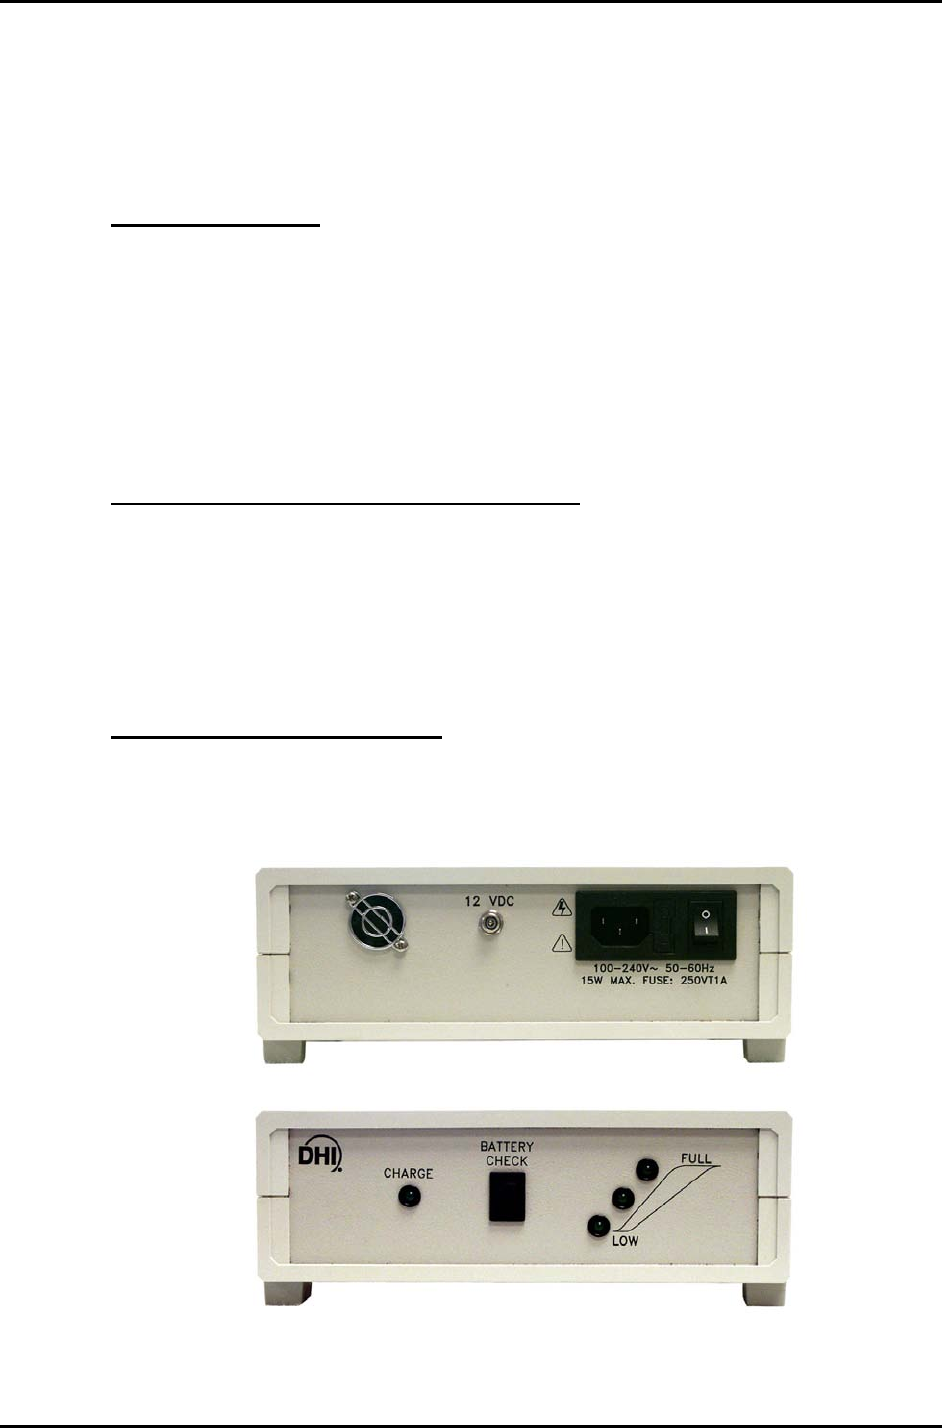
3.2.6 USE OF THE 12VDC BATTERY/CHARGER PACK
An optional 12VDC battery/charger pack is available to supply power to RPM4s 12VDC
power connection (see 1.2.3).
The battery/charger pack combines the battery and the battery charger.
To Charge the Battery
The battery may be charged while the battery/charge pack is connected to the RPM4.
To charge the battery, connect the battery/charger pack to a 100 to 240 V, 50/60 Hz power
supply using the supplied power cable and turn on the charger power switch. The green
CHARGE indicator light goes on to indicate that battery charging is in progress. Allow 14 to
16 hours for the battery to charge fully. When the battery is fully charged, the CHARGE
indicator light flashes.
When the battery charger power switch is in the ON, the battery is connected to the charger,
not the 12VDC output. When the battery charger switch is in the OFF position, the CHARGE
indicator light goes off, and 12VDC is supplied on the 12VDC connection.
To Use the Battery/Charger Pack to Supply RPM4
After charging the battery, connect the 12VDC connection of the battery/charger pack to the
12VDC connection on the RPM4 rear panel.
Turn the battery/charger pack power switch to OFF (when AC power is connected to the
battery/charger pack, the power switch must be OFF for 12VDC power to be output).
When RPM4 is connected to both a 12 VDC source and an AC source,if the RPM4 power
switch is OFF, the 12VDC source supplies the RPM4; if the RPM4 power switch is ON, the
12 VDC source is disconnected and the AC source supplies the RPM4.
To Check the Battery Charge Level
To check the current charge level of the battery, press the toggle switch on the
battery/charger pack front panel. Observe the BATTERY CHECK indicator lights. All three
lights are lit when battery is fully charged. If no light or one light is on, the battery should be
recharged.
Figure 5. Battery Pack/Charger


