


CHAPTER 4: Managing and Monitoring your Autoloader www.gateway.com
58
Setting the system time
The system time is displayed by On-board Remote Management and it is used
internally for logging events and errors (see “Setting the time” on page 29).
The time must be reset after each power up. The time can be reset automatically
if a time server is configured (see “Setting Ethernet” on page 26). Otherwise, the
time must be set manually from the front panel or through On-board Remote
Management. The time zone setting is not lost when powered off.
Important
When setting the time zone from
On-board Remote Management, it
automatically corrects for daylight
savings time. From the front panel of the
autoloader, you have to correct for
daylight savings time manually.
To set the system time:
1 Using the first list next to Time Zone, select the number of hours
difference between your local time and Greenwich Mean Time (GMT).
For example, if you live in Colorado, the time difference is - 6 hours during
Mountain Daylight Time (MDT) and - 7 hours during Mountain Standard
Time (MST).
2 Below the Time Zone field, select the current month from the list.
3 In the Day field, type the current day of the month.
4 In the Ye ar field, type the current year.
5 In the Hour box, type the current hour in 24-hour format.
6 In the Minute box, type the current minute.
7 Click Submit to save the information.
Setting network options
When you originally installed the autoloader, you set the Ethernet
configurations through the front LCD panel. However, you can modify them
through On-board Remote Management. The options include Current Network
Parameters, Set IP, and Set Network Configuration.
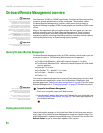
To view the Current Network Parameters:
1 From any page, click Configuration. The Configuration screen opens.
2 Click Networking. The Current Network Parameters area shows the
current IP address, MAC address, and the speed setting for the Ethernet
connection.
In the Set IP section, if a check mark appears in the box next to DHCP, the
dynamic IP address option is enabled. This means that with every reset of
the system, the IP address may change depending on the network
administrator's settings.
To set the IP address:
1 Click the box to remove the check mark from the DHCP field, if applicable.
2 In the IP address fields, type the static IP address using the TAB key to move
from box to box.