


hp psc 2400 series
chapter 3
26
memory card
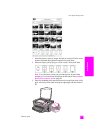
print photos by scanning a proof sheet
Tip: Make sure the glass of the HP PSC is completely clean or the
proof sheet might not scan properly. See clean the glass on
page 79 for instructions.
1 Load the appropriate paper, such as photo paper, in the input tray. Make
sure the same memory card you used to print a proof sheet is still in the
slot when you scan that proof sheet.
2 Press Proof Sheet, and then press 2.
This displays the Proof Sheet Menu and then selects Scan Proof Sheet.
The HP PSC scans the proof sheet and prints the selected photos.
set photo print options
You can control many aspects of how your HP PSC prints photos directly from
the front panel, including paper type and size, layout, and more.
This section contains the following topics:
• change photo menu print options on page 27
• set new print photo defaults on page 28
You access and set photo print options through the Photo Menu available
through the front panel.
1 Make sure the memory card is inserted into the appropriate slot on your
HP PSC.
2 Press Photo.
The Photo Menu appears.
3 Press the number next to the option you want to change.
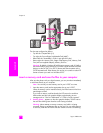
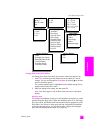
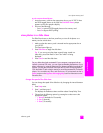
The Photo Menu gives you access to a variety of settings that affect the
way digital photos print, including number of copies, paper types, and so
on, as shown in the following illustration. The default measurements and
sizes vary according to country/region.
Photo Menu
1. Number of Copies
2. Borderless
3. Image Size
4. Paper Size
5. Paper Type
6. Layout Style
7. Borders and Frames
8. Transfer to computer
9. HP Instant Share
0. Set New Defaults