


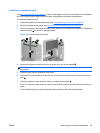
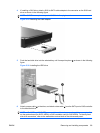
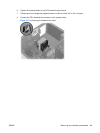

5. Disconnect the CPU heatsink fan cable from the system board as shown in the following figure.
Figure 5-32 Disconnecting the heatsink fan cable
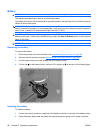
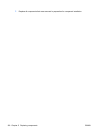
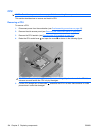
6. Before lifting the heatsink, gently twist the heatsink to break the thermal compound between the
CPU and the heatsink.
7. Lift the CPU heatsink out of the chassis
2
.
8. Use alcohol and a soft cloth to clean the thermal interface residue from the CPU and the heatsink,
allowing the alcohol on the CPU and CPU heatsink to dry completely.
Installing the CPU heatsink
To install a heatsink:
1. Disconnect power from the workstation (see
Predisassembly procedures on page 66).
2. Remove the side access panel (see
Removing the side access panel on page 69).
3. Remove the CPU heatsink (see
Removing the CPU heatsink on page 101).
4. Perform one of the following tasks:
●
If you are reusing the original heatsink, apply thermal compound to the center of the CPU top
surface.
●
If you are using a new CPU heatsink, do not apply thermal compound to the CPU because
the new heatsink already has thermal compound applied to the heatsink surface. Instead,
remove the thermal compound protective liner from the bottom of the new heatsink.
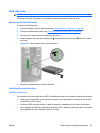
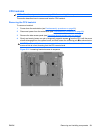
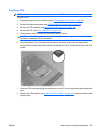
5. Align the four mounting screws with the mounting holes in the system board and carefully place
the heatsink on the CPU.
Ensure that the heatsink is placed properly with the fan positioned toward the front, facing the
memory DIMMs.
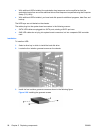
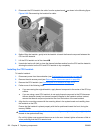
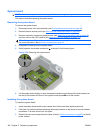
CAUTION: Do not overtighten the heatsink screws. If you overtighten them, you might strip the
threads in the system board tray.
Do not fully tighten one screw and then move on to the next. Instead, tighten all screws a little at
a time, ensuring that the CPU remains level.
102 Chapter 5 Replacing components ENWW