


HP Designjet T Series — Service Manual 6-213
Removal and Installation - Print Zone Overdrive
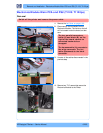
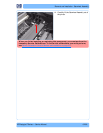
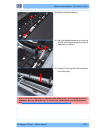
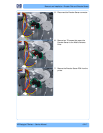
10. Remove the center coupling.
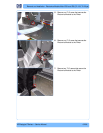
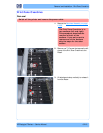
11. Use a flat bladed screwdriver to unclip the
left Print Zone Overdrive retaining clip and
rotate the clip vertically.
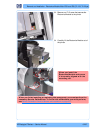
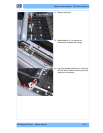
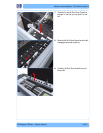
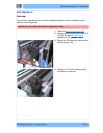
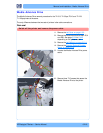
12. Carefully lift the right Print Zone Overdrive
out of the printer.
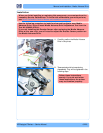
When you finish installing or replacing this component, you must perform the
necessary Service Calibrations. To find which calibrations you must perform,
see Service Calibration Guide to Removal and Installation
on page 6-5.
1
2
1
2