


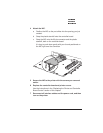


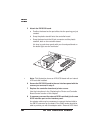
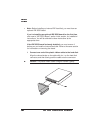
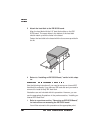

5 Attach the IDE-SCSI board.
a Position the board so the port slides into the opening you just
created.
b Snap the plastic standoff onto the controller board.
c Snap the board onto the 80-pin connector and the plastic
standoff, both on the controller board.
It’s okay to push down gently with your thumb positioned on
the board right over the connector.
» Note:
This illustration shows an IDE-SCSI board with an internal
IDE hard disk installed.
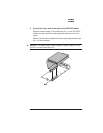
6 Secure the IDE-SCSI board to the rear interface panel with the
screws you removed in step 3.
7 Replace the controller board and printer covers.
Use the instructions in the “Replacing the Printer and Controller
Board Covers” section of this chapter.
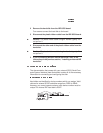
8 If necessary, connect the external SCSI hard disk(s) to the new
SCSI interface port on the interface panel.
An adapter cable may be necessary to connect the hard disk to
the DB-25 connector on the board. Your QMS vendor should be
able to provide you with this adapter cable. “External SCSI Hard