


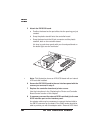
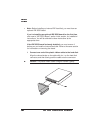


3 Attach the hard disk to the IDE-SCSI board.
Align the hard disk with the 2.5” hard disk outline on the IDE-
SCSI board. The screw holes in the bottom of the hard disk
should match up with the holes in the board.
Fasten the hard disk to the board with the four screws provided in
the kit.
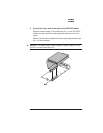
4 Return to “Installing an IDE-SCSI Board,” earlier in this chap-
ter.
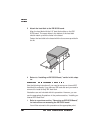
Use the following instructions if you need to remove an internal IDE
hard disk (for example, if you have an IDE hard disk and you need to
remove it to install a Kanji IDE hard disk.
Illustrations are not included with this procedure. However, you can
use the appropriate illustrations in the previous section, “Installing an
Internal IDE Hard Disk.”
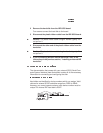
1 Refer to a previous section, “Removing an IDE-SCSI Board,”
for instructions on accessing the IDE-SCSI board.
You will be returned to this procedure at the appropriate point.