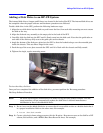
Adding a Disk Drive to an HP-UX System
144
# pvcreate -B /dev/rdsk/cXtXdX
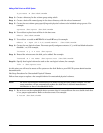
Step 3. Create a directory for the volume group using mkdir.
Step 4. Create a device file named group in the above directory with the mknod command.
Step 5. Create the root volume group specifying each physical volume to be included using vgcreate. For
example:
vgcreate /dev/vgroot /dev/dsk/cXtXdX
Step 6. Use mkboot to place boot utilities in the boot area:
mkboot /dev/rdsk/cXtXdX
Step 7. Use mkboot -a to add an AUTO file in boot LIF area, for example:
mkboot -a ‘’hpux (52.3.0;0)/stand/vmunix’’ /dev/rdsk/cXtXdX
Step 8. Create the root logical volume. You must specify contiguous extents (-C y) with bad block relocation
disabled (-r n). For example,
lvcreate -C y -r n root /dev/vgroot
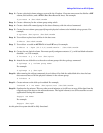
Step 9. Extend the mirrors onto the disk you’ve added. For example:
lvextend -m 1 <LV name> /dev/vgroot/root /dev/dsk/cXtXdX
Step 10. Specify that logical volume be used as the root logical volume, for example:
lvln -r /dev/vgroot/root
At this point you will need to create a file system on the disk. Refer to your HP-UX system administration
documentation.
Hot Swap Procedure for Unattached Physical Volumes
Follow these steps to replace a hot swap disk drive for unattached physical volumes.
NOTE HP often uses different manufacturers for disks having the same product number. This hot
swap procedure will not automatically update the disk driver’s internal manufacturer
information to that of the added disk drive.
Step 1. Do an ioscan on the replaced disk drive to ensure that it is accessible an also as a double check that
it is a proper replacement. Refer to the above note. For example:
# ioscan /dev/dsk/c2t4d0


