


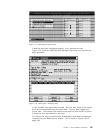
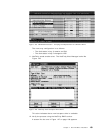
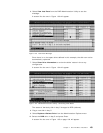

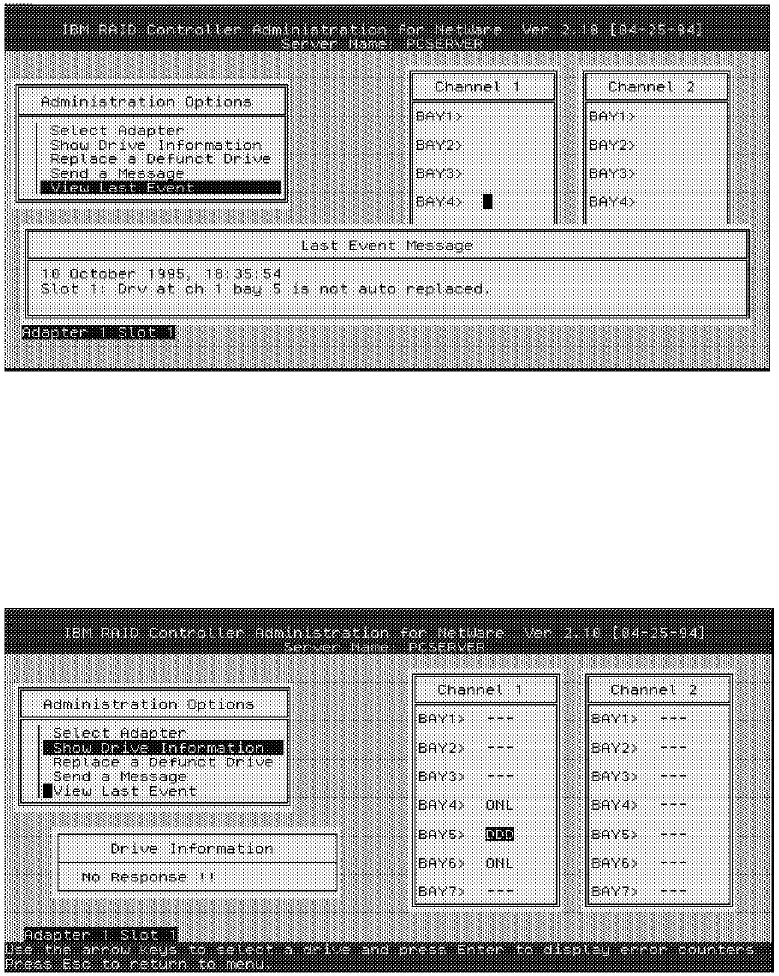
6. Select View Last Event from the RAID Administration Utility to see the
message.
A screen like the one in Figure 133 will appear.
Figure 133. Last Event Message
Since there is no hot spare drive defined in this example, the disk can not be
automatically replaced.
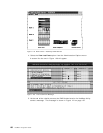
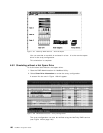
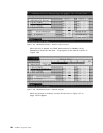
7. Select Show Drive Information to review the disks′ status in the array
configuration.
A screen like the one in Figure 134 will appear.
Figure 134. RAID Administration Utility - Reviewing Disk Status
The status of the faulty disk in bay 5 changed to DDD (defunct).
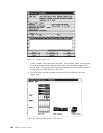
8. Plug a new disk in bay 5.
9. Select Replace a Defunct Drive from the Administration Options menu.
10. Select the DDD drive in bay 5 and press Enter.
A screen like the one in Figure 135 on page 164 will appear.
Chapter 4. Novell NetWare Installation 163