


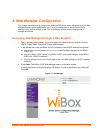

4: Web Manager Configuration
WiBox® 2100E Device Server User Guide 28
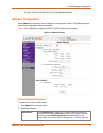
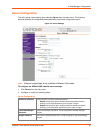
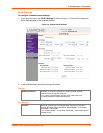
Automatic IP Address Configuration
To assign an IP address and its network configuration automatically:
1. Click Network from the main menu.
2. Select Obtain IP address automatically.
3. Enter the following (as necessary):
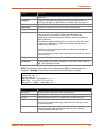
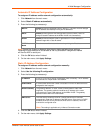
BOOTP Enable permits the Bootstrap Protocol (BOOTP). The BOOTP server assigns
the IP address automatically from a pool of addresses.
DHCP Enable permits Dynamic Host Configuration Protocol (DHCP). DHCP to
assign a leased IP address to the WiBox 2100E unit automatically.
AutoIP Enable permits the WiBox 2100E to generate an IP in the 169.254.x.x
address range with a Class B subnet.
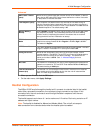
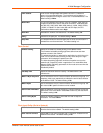
DHCP Host
Name
Enter the name of the host on the network providing the IP address.
Note: Consult the System or Network Administrator before adjusting these settings.
Disabling all three methods is not advised as the only available IP assignment method
will then be ARP or serial port.
4. Click the OK button when finished.
5. On the main menu, click Apply Settings.
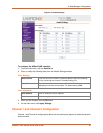
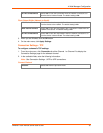
Static IP Address Configuration
To assign an IP address and its network configuration manually:
1. Click Network from the main menu.
2. Select Use the following IP configuration.
3. Enter the following (as necessary):
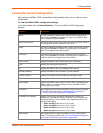
IP Address
If DHCP is not used to assign IP addresses, enter it manually. The IP address
must be set to a unique value in the network.
Subnet Mask
A subnet mask defines the number of bits taken from the IP address that are
assigned for the host part.
Default Gateway
The gateway address, or router, allows communication to other LAN
segments. The gateway address should be the IP address of the router
connected to the same LAN segment as the WiBox 2100E. The gateway
address must be within the local network.
DNS Server
The DNS server allows the name of a remote machine to be resolved
automatically. Enter the IP address of the DNS server. If the device is DHCP
enabled, the DHCP server provides the DNS server IP address, which will
override this configured value.
Note: This setting is applicable only in Manual Connection mode.
4. Click the OK button when finished.
5. On the main menu, click Apply Settings.