


7 Click Scan.
8 Retrieve the scanned image from the application, and send it through e-mail as an attachment.
Related topics:
• “Loading original documents on the scanner glass” on page 22
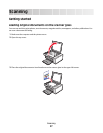
Saving a scanned image
1 Make sure the printer is connected to a computer, and both the printer and the computer are on.
2 Load an original document facedown on the scanner glass.
3 From the Finder desktop, double-click the Lexmark 5300 Series folder.
4 Double-click the Lexmark 5300 Series Center icon.
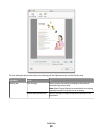
5 From the “Send scanned images to” pop-up menu, choose the application where you want to save the scanned
image.
6 Adjust the settings as needed.
7 Click Scan.
The scanned image opens in the specified application.
8 From the software application, click File Save As.
9 Enter the file name, format, and location where you want the scanned image to be saved.
10 Click Save.
Related topics:
• “Loading original documents on the scanner glass” on page 22
Scanning over a network
Setting a network printer to scan
Assigning a name to your computer
You can assign a name to your computer when you install the printer software for the first time. Choose this name
when you scan an item on the network printer and want to send the scanned image to your computer. The name of
the computer can be changed, as needed.
1 From the Finder desktop, double-click the Lexmark 5300 Series folder.
2 Double-click the Lexmark 5300 Series Center icon.
3 From the menu, choose Advanced Network Scan Settings.
4 In the Computer Name field, type in the name of your computer.
5 Click Save.
Scanning
33