


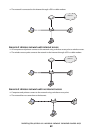

Installing the printer on an Ethernet
network (selected models only)
Information you will need to set up the printer on an
Ethernet network
• A valid, unique IP address for the printer to use on the network
• The gateway for the network
• The network mask of the network where the printer will be used
• A nickname for the printer (optional)
Notes:
• If your network automatically assigns IP addresses to computers and printers, you will not need to organize your
network information before you begin.
• A printer nickname can make it easier for you to identify your printer on the network. You can choose to use the
default printer nickname, or assign a name that is easier for you to remember.
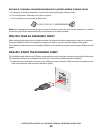
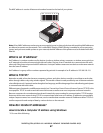
You will need an Ethernet cable to connect the printer to the network and an available port where the printer can
physically connect to the network. Use a new network cable when possible to avoid potential problems caused by
a damaged cable.
Installing the printer on a wired (Ethernet) network
Before you install the printer on a wired network, make sure that:
• You have completed the initial setup of the printer.
• Your router is on, and your network is set up and working properly.
• Your computer is connected to your router.
1 Insert the installation software CD.
If the Welcome screen does not appear after a minute, do one of the following:
In Windows Vista
a Click .
b Locate the Start Search box.
c Type D:\setup.exe, where D is the letter of your CD or DVD drive.
In Windows XP
a Click Start Run.
b Type D:\setup.exe, where D is the letter of your CD or DVD drive.
Installing the printer on an Ethernet network (selected models only)
70