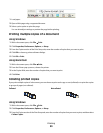
3 From the Advanced tab, select N-Up under the Layout drop-down menu.
4 Select the number of page images to print on each page.
If you want each page image to be surrounded by a border, then select Print Page Borders.
5 Click OK to close any printer software dialogs.
6 Click OK or Print.
Using Macintosh
1 With a document open, click File Print.
2 From the print options pop-up menu, choose Layout.
• From the Pages per Sheet pop-up menu, choose the number of page images that you want to print on one
sheet.
• From the Layout Direction area, click the icon that shows the order that you want the page images to print
on one sheet.
• If you want to print a border around each page image, then choose an option from the Border pop-up menu.
3 Click Print.
Printing documents from a memory card or flash drive
To enable the File print function:
• The printer must be connected to a computer through a USB cable or through a network.
• The printer and the computer must be on.
• The memory card or flash drive must contain document files that are supported by the printer.
• The computer must contain applications that support the file types in the memory device.
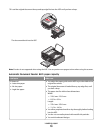
1 Insert a memory card or flash drive.
The following file types are recognized:
• .doc (Microsoft Word)
• .xls (Microsoft Excel)
• .ppt (Microsoft PowerPoint)
• .pdf (Adobe Portable Document Format)
• .rtf (Rich Text Format)
• .docx (Microsoft Word Open Document Format)
• .xlsx (Microsoft Excel Open Document Format)
• .pptx (Microsoft PowerPoint Open Document Format)
• .wps (Microsoft Works)
• .wpd (WordPerfect)
When the printer detects the memory device, the message Memory Card Detected or Storage Device
Detected appears on the printer control panel display.
2 If only document files are stored on the memory device, then the printer automatically switches to File Print mode.
If document files and image files are stored on the memory device, then press the left or right arrow button to
select Documents.
Printing
82


