62
From the MFP
1 Load the original document in the ADF facing up, short-edge first, and adjust the paper
guides.
2 Touch FTP.
3 Enter the FTP site.
4 Touch Save as Shortcut.
5 Enter a unique name for the shortcut.
6 Verify the shortcut name and number are correct, and then touch OK.
If the name or number is incorrect, touch Cancel, and reenter the information.
7 Touch Send It.
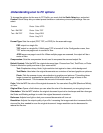
FTP options
Original Size: Opens a screen where you can enter the size of the documents you are going to copy.
• Touching any of the paper size icons on the follow-on screen will make that your selection and
return you to the FTP Options Screen.
• When Original Size is set to Mixed Sizes, you can scan different size original documents
(letter and legal size pages). They will be scaled automatically to fit the selected output media
size.
Binding: Tells the MFP whether the original document is bound on the long-edge or short-edge side.
Base File Name: Lets you enter a file name. The default value is the word image. A tamp is added
to the file name to prevent overwriting files of the same name at the FTP site.
Note: There is a 53-character limit for the file name.
Resolution: Adjusts the output quality of your file. Increasing the image resolution increases the file
size and the time needed to scan the original document. Image resolution can be decreased to
reduce the file size.
Send As: Sets the output (PDF, TIFF, or JPEG) for the scanned image.
PDF output is a single file.
TIFF output is a single file. If Multi-page TIFF is turned off in the Configuration menu, then
TIFF saves one page each in a series of files.
JPEG saves one page in each file. When multiple pages are scanned, the output will be a
series of files.


