


Configuring ISDN and Leased Line Connections 2-9
Switched async only 6. Select Date Rate (kbps) and press Return. From the pop-up
menu, select 19.2, 38.4, 57.6, 115.2, or 230.4. Choose the
data rate that is about twice your modem’s capabilities. For
instance, if you have a 28.8K modem, select 57.6 for your data
rate. Press Return.
7. The Modem Initialization String and Modem Dialing Prefix
fields configure the connection to the external modem. For
information on editing this configuration, see the Netopia
Router 3.2 Release Note.
8. The Data Link Encapsulation is set to Async PPP.
9. You are now finished configuring the Serial Line Configuration
screen. Press the Escape key to return to the WAN Setup
screen. Go to page 2-13 for information on how to configure
your leased line connection profile.
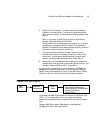
Line configuration for a T1 line
The T1 Line Configuration screen is where you enter the
configuration parameters for your leased line, in order for the
Netopia Router to communicate with the physical connection. Use
the information in the Leased Line worksheet in the Getting Started
Guide as a reference when specifying your T1 configuration
information.