REPLACING CONSUMABLE ITEMS > 182
6.
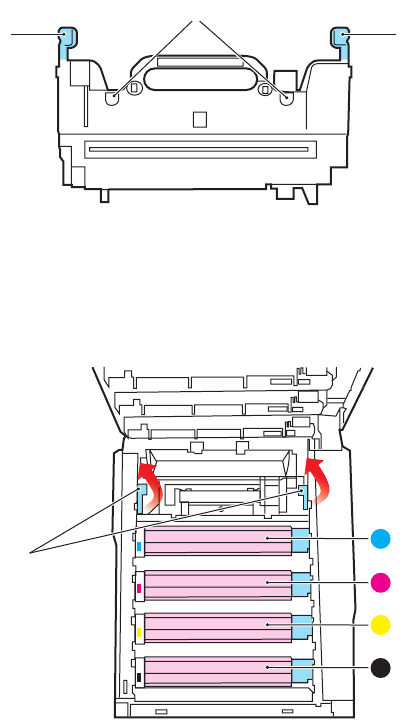
Holding the new fuser by its handle, make sure that it is the
correct way round. The retaining levers (2) should be fully
upright, and the two locating lugs (3) should be towards you.
7.
Lower the fuser into the printer, locating the two lugs (3) into
their slots in the metal partition which separates the fuser
area from the image drums.
8.
Push the two retaining levers (2) towards the rear of the printer
to lock the fuser in place.
9.
Finally, close the top cover and press down firmly at both sides
so that the cover latches closed.
3
22
2
C
M
Y
K


