3URGXFW5HIHUHQFH*XLGH 2-3
&KHFNVWDQG'HVLJQ
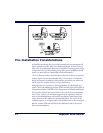
1. Select a design which allows load-sharing by several muscle
groups (for example designs which allow the cashier to use both
hands for scanning and bagging).
2. Select checkstands which deliver products to the cashier on an
input belt and do not require the unloading of items from a cart.
These designs put less stress on the cashiers’ shoulders and back.
3. Minimize the distance between the input and take-away convey-
ors (i.e., the distance the cashier has to reach to move the prod-
ucts).
4. Minimize the width of the input conveyor to reduce the cashier’s
reach to items on the far side of the belt; use a diverter to direct
products closer to the cashier.
5. Select a design which encourages the cashier to slide products
across the scanner rather than gripping and lifting. Make sure the
horizontal surface of the scanner is flush with all surrounding sur-
faces.
6. Choose a design which integrates the scanner and scale to elimi-
nate extended reaches and lifts during weighing tasks.
7. Provide an easily accessible bag stand at a height 13 - 17 inches
(33 - 43.2 cm) lower than the top surface of the checkstand to
reduce stresses to the shoulders, elbows, and risks associated with
lifting products into bags.
8. Do not position the bag stand between the cashier and the scan-
ner, due to the increased reach involved.
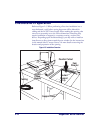
9. Position the scanner’s horizontal scanning surface 34 - 36 inches
(86.4 - 91.4 cm) above the floor. Maintain a minimum of five
inches (12.7 cm) clearance between elbows and work surfaces.
10. Provide adjustable keyboard mounting (height, tilt, and horizon-
tal reach).
11. Position the printer, cash drawer, and other checkstand devices
the cashier uses within easy reach (less than 18 inches/45.7 cm).
12. Provide adequate toe space, foot rests or rails, antifatigue mats,
and where feasible, an adjustable seat or stand against which the
cashiers can lean.


