3URGXFW5HIHUHQFH*XLGH 2-25
3ODFLQJDQG,QVWDOOLQJWKH5HPRWH6FDOH'LVSOD\
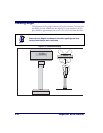
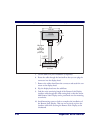
1. Determine where you want to install the Remote Scale Display
based on your counter design, the viewing angle and lighting con-
siderations discussed previously. Reference Figure 2-13 for the
display’s physical dimensions.
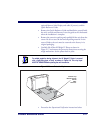
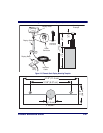
2. Use the template provided in Figure 2-15 to mark locations of the
mounting screw and cable routing holes. The mounting screw
holes are on 3
3
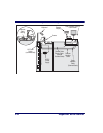
/8” (8.57 cm) centers. The cable can either be
routed through a
3
/4” (19 mm) diameter hole directly under the
mounting base or through the cutout in the back of the base (see
Figure 2-14).
3. Drill the mounting screw holes using a drill bit of the appropriate
diameter for your mounting screws or bolts.
4. Drill the cable routing hole using a
3
/4” (19 mm) drill bit
(optional).
It may be necessary to shorten the stalk that supports the display head so
that the display is installed at eye level.
NOTE
The connector at the Remote Scale Display end is secured with a rubber
band during shipping to prevent damage to the “locking tabs” (see
Figure 2-14). After routing the cable, remove this rubber band before the
cable end connecting to the Remote Scale Display head. Failure to remove
the band will keep the connector from latching properly when it is connected
to Remote Scale Display port.


