


50 PRINT #1,E$;"A"; Sends an “<ESC>A” command code to
Print Port #1 opened by statement 20
above.
60 PRINT #1, E$;"H400";E$;"V100";E$;"XL1SATO"; Sends the data “SATO” to be placed
400 dots horizontally and 100 dots
vertically on the label and printed in the
“XL” autosmoothed font.
50 PRINT #1, E$;"Q1"; Instructs the printer to print a quantity of
one label.
60 PRINT #1, E$; “Z”; Tells the printer that the last command
has been sent. The printer can now
create and print the job.
70 PRINT #1,CHR$ (3); Sends an <ETX> (ASCII Code decimal
“3”) to the printer telling it that this is the
end of the message.
THE PRINT AREA
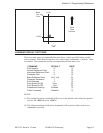
The maximum print area for the various CL Series “e” printers is listed in Table 5.1.
Most of your label applications will not require labels that fill the entire print area,
therefore it is important to understand how to work with labels that do not use the
entire print area. The goal is to help you avoid printing where no label exists, which
may lead to print head damage, not to mention frustration when you cannot see the
printed output.
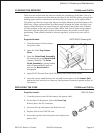
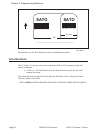
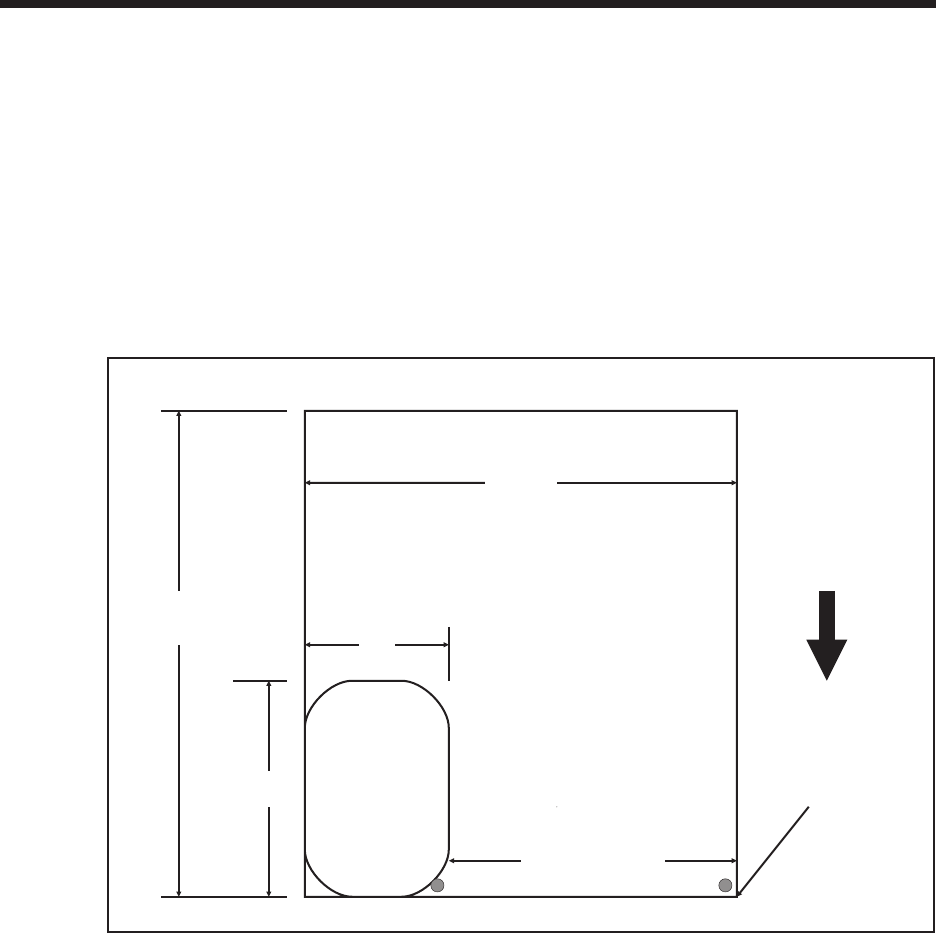
The diagram below illustrates the maximum print area and a sample 2 inch wide by 3
inch long label placed within this area. As can be seen, your label will be oriented
against the inside left edge of the printer as viewed from the front of the printer. The
normal reference point is located at the H1, V1 position of the print area in the
normal print orientation (no rotation).
Section 5. Programming Reference
Page 5-4 PN 9001074 Preliminary SATO CL Series“e” Printers
Max
Print
Width
Max. Print
Length
3"
2"
Print Area
Your
Label
Label
Feed
Direction
Normal
Reference
Point
H1, V1
Max. Print
Width minus 2"