


2-84
COPIER
Contents
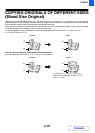
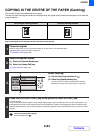
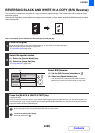
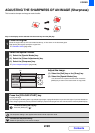
COPYING IN THE CENTRE OF THE PAPER (Centring)
This is used to centre the copied image on the paper.
This lets you place the image in the centre of the paper when the original size is smaller than the paper size or when the
image is reduced.
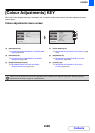
Keys in the display can be selected with the arrow keys and the [OK] key.
Not using the centring function Using the centring function
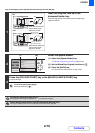
1
Place the original.
Place the original face up in the document feeder tray, or face down on the document glass.
After placing the original, specify the original size.
☞ ORIGINAL SIZES (page 2-28)
2
Select the special modes.
(1) Select the [Special Modes] key.
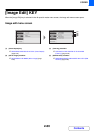
(2) Select the [Image Edit] key.
☞ [Image Edit] KEY (page 2-80)
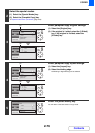
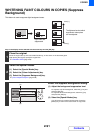
3
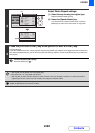
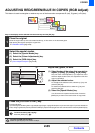
Select Centring.
(1) Set the [Centring] checkbox to .
(2) Select the [Special Modes] key.
You will return to the special modes screen. Press the
[BACK] key to return to the base screen of copy mode.
4
Press the [COLOUR START] key or the [BLACK & WHITE START] key.
Copying will begin.
If you are using the document glass to copy multiple original pages, copying will take place as you scan each original. If you
have selected sort mode, change originals and press the [START] key. Repeat until all pages have been scanned and then
select the [Read-End] key. (For the second original and following originals, use the same [START] key as you did for the first
original.)
To cancel scanning and copying...
Press the [STOP] key ( ).
OKBACK
(1)
(2)