


SETTING THE SYSTEM CONFIGURATION
4-56 XEROX DOCUPRINT 4050/4090 IPS GUIDE TO CONFIGURING AND MANAGING THE SYSTEM
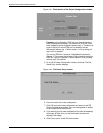
3. Click Quit to specify these stitching attributes for the present
configuration file and return to the IPS Output Configuration
window.
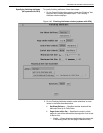
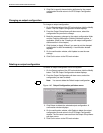
Changing an output configuration
To change an output configuration:
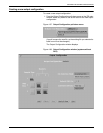
1. On the Output section of the IPS main window, click the Modify
button. The IPS Output Configuration window displays.
2. From the Output Group Name pull-down menu, select the
configuration file you want to change.
3. Make the necessary changes to the output configuration fields
and the Finishing Attributes or Stitching Attributes options, if
applicable. (Refer to the “Creating a new output configuration”
section earlier in this chapter.)
4. Click Update (or Apply & Save if you want to put the changed
configuration in effect immediately). A confirmation window
displays.
5. On the confirmation window, click Update to save the new
settings.
6. Click Quit to return to the IPS main window.
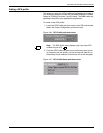
Deleting an output configuration
To delete an output configuration file for the system:
1. On the Output section of the IPS main window, click the Modify
button. The IPS Output Configuration window displays.
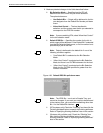
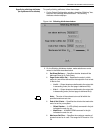
2. From the Output Configuration pull-down menu, select the
configuration you want to delete.
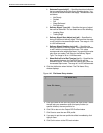
Note: You cannot delete the Default output configuration.
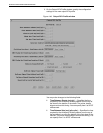
Figure 4-45. Output Configuration pull-down menu
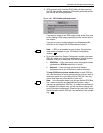
3. Click Delete to delete the selected output configuration. A
confirmation window displays.
4. On the confirmation window, click Delete to delete the output
configuration file and return to the IPS Output Configuration
window. The file name is removed from the Output Group Name
pull-down menu.
5. Click Quit to return to the IPS main window.