STARTING AND STOPPING THE SYSTEM
2-2 XEROX DOCUPRINT 4050/4090 IPS GUIDE TO CONFIGURING AND MANAGING THE SYSTEM
Powering on procedure Power on the IPS system in the following sequence:
1. Power on all peripherals, such as the optional tape drive and
display monitor.
2. If your system is channel-attached, power on the Host Channel
Unit (HCU). When the HCU is ready (offline) the code 2
displays in its LED window. You can now power on the
remaining components.
Note: The HCU displays a 2. When the Sun workstation is
completely booted, the display shows 0.
See “HCU Messages” in the Xerox DocuPrint IPS Messages
Guide for a list and explanation of HCU codes.
3. Power on the printer, if necessary.
4. Power on the Sun workstation processor. The operating system
for the Printer Controller and the IPS application software are
automatically loaded.
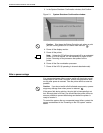
5. If the printer is not warmed up by the time the Controller has
booted, the window containing the message DocuPrint IPS
Initializing, “Waiting for Printer Configuration” remains on the
screen. Either:
• Wait for the printer to warm up and the message to
disappear (which takes a varying amount of time), or,
• Use the following procedure to reduce the amount of boot
time:
a. With the cursor on the blue screen background, click
the right mouse button to display the workspace pull-
down menu.
b. Select Restart from the workspace menu, then Confirm
from the confirmation prompt that displays. The Printer
Controller reboots.
c. After the Controller boots, a window displays with the
message “Media Definition Conflict” (because no
default input configuration has been applied). Click OK
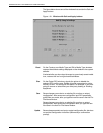
to display the Input Configuration window.
d. Make sure the paper loaded in the feeder trays
matches the stock specified in the Printer Trays cells
on the Input Configuration window. If it does not, make
any necessary changes to the paper in the trays or to
the media icons in the tray cells. (Refer to “Specifying
the input configuration” in the “Setting the system
configuration” chapter.)
e. Click Apply & Update on the Input Configuration
window.
f. On the confirmation prompt window that displays, click
Apply.
g. Click Quit on the Input Configuration window. The IPS
main window displays.


