


SETTING THE SYSTEM CONFIGURATION
4-60 XEROX DOCUPRINT 4050/4090 IPS GUIDE TO CONFIGURING AND MANAGING THE SYSTEM
• Statuses Supported (p7) — Specifies the status indicators
that are supported by the third party finishing device. You
can check all status indicators that apply. The selections are
as follows:
— Not Ready
— Faulted
— Full
— Sheet Delivered
— Set Delivered
• Delivery Signal Type (p8) — Specifies the type of signal
that can be delivered. You can select one of the following:
— Leading Edge
— Trailing Edge
• Delivery Signal Start Adjust (ms) (p9) — Specifies the
timing of the start of delivery signal. You can enter the value
or set it with the incremental spin boxes. The range is -100
to +300 milliseconds.
• Delivery Signal Duration (ms) (p10) — Specifies the
timing of the End of Delivery signal. You can enter the value
or set it with the incremental spin boxes. This value
corresponds to the width of the sheet. You specify this value
only when you select Trail Edge for the Delivery Signal
Type. The range is 30 to 110 milliseconds.
• Sheet Exit to End of Set Time (ms) (p11) — Specifies the
time required between the EndOfSet signal and the
SheetExit signal. You can enter the value or set it with the
incremental spin boxes. The range is 0 to 255 milliseconds.
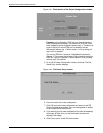
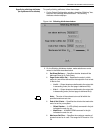
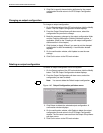
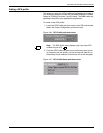
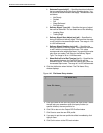
4. Click the Add button when finished. The File Name Entry
window displays.
Figure 4-49. File Name Entry window
5. Enter the name for the new DFA profile. Be sure to use a name
that will help you remember which third-party finisher (or
specific function) the new profile is for.
6. Click OK to return to the Output DFA Profile window.
7. Click Save to save the new DFA profile.
8. If you want to put the new profile into effect immediately, click
Apply & Save.
9. Click Quit to return to the IPS main window.