


Page 16 Web Print Manager Tool User Guide
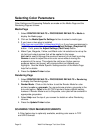
Selecting Color Parameters
Color Settings and Processing Defaults are made on the Media Page and the
Rendering Page as follows:
Media Page
1. Select PRINTER DEFAULTS > PROCESSING DEFAULTS > Media to
display the Media page.
2. Click on the Media Specific Settings list box to select a media type.
3. If you have a Java plug-in installed
(http://java.sun.com/j2se/1.4/download.html), or if you have permissions to
install it for your browser, then select the Adjust Settings (Graphical UI)
button. If not, press the Adjust Settings (Text Form) button.
4. Make Cyan, Magenta, Yellow, and Black color ink selections to set up the
ink limit and output gamma that will be applied to the image.
Ink Limit is used to change the maximum amount of ink used in printing.
Gamma is used to adjust the entire color curve without moving the
endpoints of the curve. This adjusts the mid tones (higher gamma
produces darker mid tones), with minimal effect on shadows and
highlights. See the Media Specific Settings section of the Media Page
help file for details.
5. Press the Update Printer button.
Rendering Page
1. Select PRINTER DEFAULTS > PROCESSING DEFAULTS > Rendering
to display the Rendering page.
2. Render Mode - Click on this list box to set the Render Mode for color
printers to color or grayscale. For monochrome printers, grayscale is the
only valid option. Color is the X2-TECH printer’s factory default setting,
however if Render Mode is set to Grayscale, color jobs will be rendered in
appropriate grayscales.
3. Select Help near the top of your screen for details on other Rendering
choices.
4. Press the Update Printer button.
SCANNING YOUR IMAGES/DOCUMENTS
A Color feature key is optionally available, enabling color scans in TIFF
and JPEG formats.